OpenStack、OpenDayLight、硬件SDN交换机集成
本文将讲述如何在OpenStack中使用SDN交换机,同时将OpenDayLight作为控制器,测试网络类型为vxlan。
本文适用目标为OpenStack Neutron组件,但理论上说包括任何可使用Neutron组件服务的云管理平台,比如oVirt。
在搭建Neutron时,笔者使用了现成的OpenStack单节点平台(可以参考https://github.com/lofyer/openstack-pxe-deployment,为防止出现3.1节末的错误,请使用Newton之前版本,我手贱部署了最新的),但为了减少搭建部署的麻烦,我会在后期尝试直接使用Neutron VM Appliance,方便集成(暂不确定是否影响性能)。
update 2017-05-27: 当前版本zstack的云路由功能vyos所实现的nfv软路由,笔者会考虑将Neutron移植到ZStack中,如此以来SDN即可将注意力主要放在Neutron。
update 2017-06-01: 加入盛科交换机,4.10内核的vtep可直接内核实现,参考Linux doc 。
update 2017-06-07: OpenStack版本从Ocata切换为Newton,实验3.3重新做了。
update 2017-06-12: 使用 Neutron appliance,并添加hooks,构建ZStack SDN解决方案,来源可自行搜索oVirt的相关资料
1. 环境准备
Pica8 P-5101 48+4*8 10Gb SDN交换机2台(吵地脑袋疼),OpenStack Ocata,OpenDayLight Lastest,管理机器。
mininet虚拟机地址:192.168.0.68
操作机地址:192.168.0.55
2. 架构方案与mininet环境模拟实验
拓扑使用miniedit制作,同时首选项中打开“Start CLI”,操作机“ssh -Y mininet@MININET_IP”后,运行“sudo ~/mininet/examples/mininet.py”以开启。
2.1. 基础模拟实验——交换机互联
文字描述可参考http://blog.scottlowe.org/2012/11/27/connecting-ovs-bridges-with-patch-ports/以及其中链接。
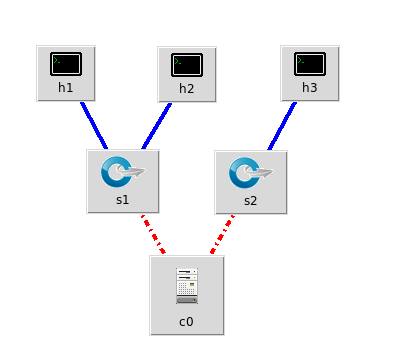
miniedit拓扑:
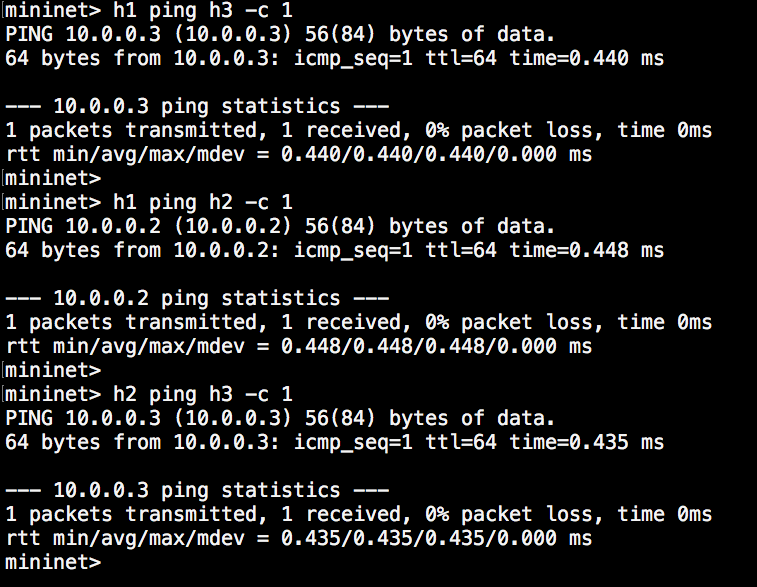
目的:连接两个交换机,使得h1与h3互通。
方法:将两个交换机上的一个端口组组成patch。
ovs-vsctl -- add-port s1 patch1 -- set interface patch1 type=patch options:peer=patch2 -- add-port s2 patch2 -- set interface patch2 type=patch options:peer=patch1
结果:
root@mininet-vm:/home/mininet# ovs-vsctl show 918037ec-b307-45d7-a75a-f1ac4337d135 Bridge "s1" Controller "tcp:127.0.0.1:6633" is_connected: true fail_mode: secure Port "s1" Interface "s1" type: internal Port "s1-eth2" Interface "s1-eth2" Port "s1-eth1" Interface "s1-eth1" Port "patch1" Interface "patch1" type: patch options: {peer="patch2"} Bridge "s2" Controller "tcp:127.0.0.1:6633" is_connected: true fail_mode: secure Port "s2-eth1" Interface "s2-eth1" Port "s2" Interface "s2" type: internal Port "patch2" Interface "patch2" type: patch options: {peer="patch1"} ovs_version: "2.0.2"
2.2. 进阶实验——流表
miniedit拓扑:同上。
目的:阻断h1与h2、h2与h3,使得h1与h3互通。
方法:下发如下流表。
阻断h2与h1/h3的协议封包: ovs-ofctl add-flow s1 in_port=2,arp,ip,nw_dst=10.0.0.1,actions=drop ovs-ofctl add-flow s1 in_port=2,arp,ip,nw_dst=10.0.0.3,actions=drop
结果
mininet> h1 ping h2 -c 2 PING 10.0.0.2 (10.0.0.2) 56(84) bytes of data. ^C --- 10.0.0.2 ping statistics --- 2 packets transmitted, 0 received, 100% packet loss, time 1006ms
mininet> h2 ping h1 -c 2 PING 10.0.0.1 (10.0.0.1) 56(84) bytes of data. ^C --- 10.0.0.1 ping statistics --- 2 packets transmitted, 0 received, 100% packet loss, time 1000ms
mininet> h3 ping h2 -c 2 PING 10.0.0.2 (10.0.0.2) 56(84) bytes of data. ^C --- 10.0.0.2 ping statistics --- 2 packets transmitted, 0 received, 100% packet loss, time 999ms
mininet> h2 ping h3 -c 2 PING 10.0.0.3 (10.0.0.3) 56(84) bytes of data. ^C --- 10.0.0.3 ping statistics --- 2 packets transmitted, 0 received, 100% packet loss, time 1006ms
mininet> h1 ping h3 -c 2 PING 10.0.0.3 (10.0.0.3) 56(84) bytes of data. 64 bytes from 10.0.0.3: icmp_seq=1 ttl=64 time=2.37 ms 64 bytes from 10.0.0.3: icmp_seq=2 ttl=64 time=0.561 ms
--- 10.0.0.3 ping statistics --- 2 packets transmitted, 2 received, 0% packet loss, time 1001ms rtt min/avg/max/mdev = 0.561/1.466/2.372/0.906 ms mininet> h3 ping h1 -c 2 PING 10.0.0.1 (10.0.0.1) 56(84) bytes of data. 64 bytes from 10.0.0.1: icmp_seq=1 ttl=64 time=2.49 ms 64 bytes from 10.0.0.1: icmp_seq=2 ttl=64 time=0.548 ms
--- 10.0.0.1 ping statistics --- 2 packets transmitted, 2 received, 0% packet loss, time 1001ms rtt min/avg/max/mdev = 0.548/1.521/2.494/0.973 ms mininet>
root@mininet-vm:~# ovs-ofctl dump-flows s1 NXST_FLOW reply (xid=0x4): cookie=0x0, duration=485.308s, table=0, n_packets=0, n_bytes=0, idle_age=485, ip,in_port=2,nw_dst=10.0.0.1 actions=drop cookie=0x0, duration=483.569s, table=0, n_packets=3, n_bytes=294, idle_age=183, ip,in_port=2,nw_dst=10.0.0.3 actions=drop cookie=0x0, duration=1715.894s, table=0, n_packets=93, n_bytes=3906, idle_age=202, arp,in_port=1,arp_tpa=10.0.0.2 actions=drop cookie=0x0, duration=715.43s, table=0, n_packets=4, n_bytes=392, idle_age=400, ip,in_port=1,nw_dst=10.0.0.2 actions=drop
3. 综合实验环境配置
首先来看一下实验拓扑:
图。。。。。。
SDN交换机 管理地址:192.168.0.250/24,
OpenStack Controller/Neutron IP: 192.168.0.80
OpenDayLight IP: 192.168.0.90 Web: http://192.168.0.90:8181/index.html
3.1. 设置OpenDayLight
在主机192.168.0.90上下载启动Boron版本OpenDayLight(其他版本未测试),然后解压运行(需要Java环境):
unzip distribution-karaf-0.5.3-Boron-SR3.zip cd distribution-karaf-0.5.3-Boron-SR3
启动ODL服务
./bin/start
本地安装并启动OpenvSwitch以作测试
yum localinstall -y https://repos.fedorapeople.org/repos/openstack/openstack-ocata/rdo-release-ocata-3.noarch.rpm systemctl enable openvswitch systemctl start openvswitch ovs-vsctl set-manager tcp:192.168.0.90:6640
进入客户端
./bin/client
安装netvirt与dlux界面,其中yangman为包管理器UI
opendaylight-user@root> feature:install odl-netvirt-openstack odl-dlux-all odl-dlux-yangman odl-mdsal-apidocs odl-netvirt-ui
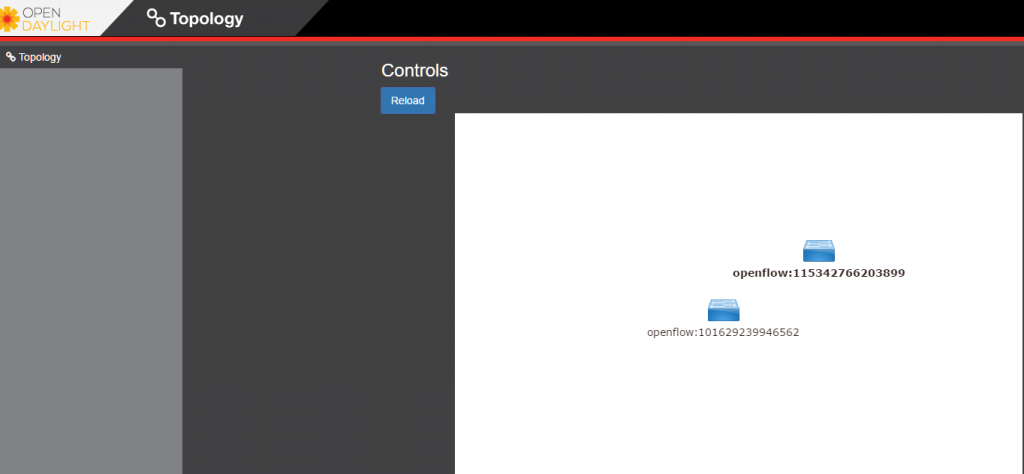
然后访问http://192.168.0.90:8181/index.html,用户密码为admin/admin,可以看到我们刚刚添加的本地OVS。
3.3. OpenStack与OpenDayLight集成
首先要清除原有的实例和neutron网络。
实例
openstack server list +--------------------------------------+-----------+---------+------------+-------------+------------------------------------------------------+ | ID | Name | Status | Task State | Power State | Networks | +--------------------------------------+-----------+---------+------------+-------------+------------------------------------------------------+ | d45b1646-b559-4d6d-963c-af3da205aa36 | instance3 | SHUTOFF | - | Shutdown | flat-ens39=192.168.0.108; sharednet1=192.168.118.203 | +--------------------------------------+-----------+---------+------------+-------------+------------------------------------------------------+
openstack server delete instance3
网络
openstack subnet list +--------------------------------------+-------------+--------------------------------------+------------------+ | ID | Name | Network | Subnet | +--------------------------------------+-------------+--------------------------------------+------------------+ | b0acb3ad-22d4-491c-94e7-488aca906398 | flat-subnet | b8f95552-9a45-49ae-b080-2e0041d4b2a0 | 192.168.0.0/24 | | c066992d-294d-4cd6-a3fb-0386619922c7 | subnet1 | 5ac25e6f-bf49-4217-abbc-11bf171c0a3e | 192.168.118.0/24 | +--------------------------------------+-------------+--------------------------------------+------------------+
openstack router list +------------------------------+-------------------+--------+-------+-------------+-------+------------------------------+ | ID | Name | Status | State | Distributed | HA | Project | +------------------------------+-------------------+--------+-------+-------------+-------+------------------------------+ | 78507b26-38f0-4b4a- | router-flat-ens39 | ACTIVE | UP | False | False | de2aea51161642759a687b5768b2 | | a3c6-13d15c4f9665 | | | | | | 3b7e | +------------------------------+-------------------+--------+-------+-------------+-------+------------------------------+ ........
删除所有port、router、subnet后,再用如下命令检查一遍,应该为空
openstack port list
接下来,我们将控制节点(neutron管理节点)与计算节点的OVS交于ODL管理。 首先停止相应服务。
计算节点,如果与控制节点相同则优先运行此部分内容
systemctl stop neutron-openvswitch-agent systemctl disable neutron-openvswitch-agent systemctl stop neutron-l3-agent systemctl disable neutron-l3-agent
Neutron控制节点
systemctl stop neutron-server systemctl stop neutron-l3-agent
然后清空OVS数据库。
systemctl stop openvswitch rm -rf /var/log/openvswitch/* rm -rf /etc/openvswitch/conf.db systemctl start openvswitch
清空后可看到如下
ovs-vsctl show bdf45776-c7c2-4df4-9911-007e89b67bbe ovs_version: "2.6.1"
将其交予ODL管理。
ovs-vsctl set-manager tcp:192.168.0.90:6640
然后在控制节点与计算节点设置用来vxlan通信的本地端,这里只有一个节点192.168.0.80。
ovs-vsctl set Open_vSwitch . other_config:local_ip=192.168.0.80
设置好以后可以在节点上看到ODL自动创建了一个连接到ODL控制器的br-int。
ovs-vsctl show bdf45776-c7c2-4df4-9911-007e89b67bbe Manager "tcp:192.168.0.90:6640" is_connected: true Bridge br-int Controller "tcp:192.168.0.90:6653" is_connected: true fail_mode: secure Port br-int Interface br-int type: internal ovs_version: "2.6.1"
ovs-vsctl get Open_vSwitch . other_config
接下来让neutron使用ODL,我们首先需要在neutron控制节点上安装一个对应包。
对于将ODL放置于OS控制节点的同学可以参考如下内容以修改swift端口:
First, ensure that port 8080 (which will be used by OpenDaylight to listen for REST calls) is available. By default, swift-proxy-service listens on the same port, and you may need to move it (to another port or another host), or disable that service. It can be moved to a different port (e.g. 8081) by editing /etc/swift/proxy-server.conf and /etc/cinder/cinder.conf, modifying iptables appropriately, and restarting swift-proxy-service. Alternatively, OpenDaylight can be configured to listen on a different port, by modifying the jetty.port property value in etc/jetty.conf.
yum install -y python-networking-odl
修改/etc/neutron/plugins/ml2/ml2_conf.ini并添加内容。
crudini --set /etc/neutron/plugins/ml2/ml2_conf.ini ml2 mechanism_drivers opendaylight crudini --set /etc/neutron/plugins/ml2/ml2_conf.ini ml2 tenant_network_types vxlan
ml2_conf_odl.ini中的设置无效且报错,可能是我姿势不对,原因是我忘了修改neutron-server的启动命令。
cat <> /etc/neutron/plugins/ml2/ml2_conf.ini [ml2_odl] url = http://192.168.0.90:8080/controller/nb/v2/neutron password = admin username = admin EOF
然后修改服务后端为ODL。
crudini --set /etc/neutron/neutron.conf DEFAULT service_plugins odl-router crudini --set /etc/neutron/dhcp_agent.ini DEFAULT force_metadata True crudini --set /etc/neutron/dhcp_agent.ini ovs ovsdb_interface vsctl
重置neutron数据库并重启服务。
mysql -e "DROP DATABASE IF EXISTS neutron_ml2;" -uroot -p mysql -e "CREATE DATABASE neutron_ml2 CHARACTER SET utf8;" -uroot -p neutron-db-manage --config-file /etc/neutron/neutron.conf --config-file /etc/neutron/plugins/ml2/ml2_conf.ini upgrade head systemctl start neutron-server
验证是否成功。
curl -u admin:admin http://192.168.0.90:8080/controller/nb/v2/neutron/networks { "networks" : [ ] }
最后在openstack中创建网络与实例。
neutron router-create router1 neutron net-create private neutron subnet-create private --name=private_subnet 10.10.5.0/24 neutron router-interface-add router1 private_subnet nova boot --flavor
添加浮动IP。
ovs-vsctl set Open_vSwitch . other_config:provider_mappings=physnet1:eth1 neutron net-create public-net -- --router:external --is-default --provider:network_type=flat --provider:physical_network=physnet1 neutron subnet-create --allocation-pool start=10.10.10.2,end=10.10.10.254 --gateway 10.10.10.1 --name public-subnet public-net 10.10.0.0/16 -- --enable_dhcp=False neutron router-gateway-set router1 public-net
neutron floatingip-create public-net nova floating-ip-associate test1
在OpenStack O版中创建网络时ODL与OS分别出现如下错误。
ODL: 2017-06-03 11:27:10,768 | ERROR | pool-46-thread-1 | QosInterfaceStateChangeListener | 350 - org.opendaylight.netvirt.neutronvpn-impl - 0.3.3.Boron-SR3 | Qos:Exception caught in Interface Operational State Up event java.lang.IllegalArgumentException: Supplied value "tapd5e5b153-39" does not match required pattern "^[0-9a-fA-F]{8}-[0-9a-fA-F]{4}-[0-9a-fA-F]{4}-[0-9a-fA-F]{4}-[0-9a-fA-F]{12}\(" at com.google.common.base.Preconditions.checkArgument(Preconditions.java:145)[65:com.google.guava:18.0.0] at org.opendaylight.yang.gen.v1.urn.ietf.params.xml.ns.yang.ietf.yang.types.rev130715.Uuid.<init>(Uuid.java:55)[80:org.opendaylight.mdsal.model.ietf-yang-types-20130715:2013.7.15.9_3-Boron-SR3] at org.opendaylight.netvirt.neutronvpn.QosInterfaceStateChangeListener.add(QosInterfaceStateChangeListener.java:61)[350:org.opendaylight.netvirt.neutronvpn-impl:0.3.3.Boron-SR3] at org.opendaylight.netvirt.neutronvpn.QosInterfaceStateChangeListener.add(QosInterfaceStateChangeListener.java:27)[350:org.opendaylight.netvirt.neutronvpn-impl:0.3.3.Boron-SR3] at org.opendaylight.genius.datastoreutils.AsyncDataTreeChangeListenerBase\)DataTreeChangeHandler.run(AsyncDataTreeChangeListenerBase.java:136)[310:org.opendaylight.genius.mdsalutil-api:0.1.3.Boron-SR3] at java.util.concurrent.ThreadPoolExecutor.runWorker(ThreadPoolExecutor.java:1142)[:1.8.0_131] at java.util.concurrent.ThreadPoolExecutor$Worker.run(ThreadPoolExecutor.java:617)[:1.8.0_131] at java.lang.Thread.run(Thread.java:748)[:1.8.0_131]
OS: ERROR neutron.plugins.ml2.managers [req-8174eb6e-6a01-428e-9c3d-d9f115dfa36b - - - - -] Failed to bind port d5e5b153-390a-4129-babd-7work': None, 'id': u'f01e69c5-096e-4d01-a239-5dbe37005e9b', 'network_type': u'vxlan'}]
原因可能是版本传参变了,ODL没及时更新,但我不会Java,会也不想去改ODL,所以我推荐读者用个老版本的Neutron,比如M版、N版啥的。
3.4. OVS创建vtep
IP: 192.168.0.101
3.5. OpenStack与SDN交换机集成
在ODL结束以后,我们再来试一下OpenStack与SDN交换机的集成,与上一节相互独立,即一个全新的OpenStack Newton环境。
由于商业法务问题,我不会将Pica8的OpenStack插件源码全部放出来,另外放出来意义也不大,现有SDN交换机的同学可以直接向厂商索要。
/usr/lib/python2.7/site-packages/neutron/plugins/ml2/drivers/
Pica8交换机工作在OVS模式下,需要将neutron server与OVS Manager相连(管理网口),或许有其他方法。
首先将插件文件拷贝至/usr/lib/python2.7/site-packages/neutron/plugins/ml2/drivers/,目录结构如下。
/usr/lib/python2.7/site-packages/neutron/plugins/ml2/drivers/pica8/ ├── config.pyc ├── db.pyc ├── exceptions.pyc ├── init.pyc ├── mechanism_pica8.pyc ├── ml2_conf_pica8.ini ├── rpc.pyc └── vtep.ovsschema
修改/usr/lib/python2.7/site-packages/neutron-9.3.1-py2.7.egg-info/entry_points.txt添加neutron驱动。
... [neutron.ml2.mechanism_drivers] ... pica8 = neutron.plugins.ml2.drivers.pica8.mechanism_pica8:Pica8Driver ...
创建/etc/neutron/plugins/ml2/ml2_conf_pica8.ini,并添加如下内容。
[ml2_pica8]
(ListOpt) List of other VTEPs' IP address, either a software vtep or
other vendor's hardware vtep.
Example: vtep_list=10.0.0.100,10.0.0.101,10.0.0.102
vtep_list=192.168.0.101
(IntOpt) Sync interval in seconds between Neutron plugin and PicaOS.
This field defines how often the synchronization is performed.
This is an optional field. If not set, a value of 180 seconds
is assumed.
sync_interval = 60
Example: sync_interval = 60
openstack_version = newton
Example: openstack_version = kilo
PicOS Switch configurations.
Each switch to be managed by Openstack Neutron must be configured here.
Format:
[ml2_mech_pica_switch:192.168.0.250] =:,,... =: # =:project_name,,vni, # ...
ovsdb_port=
Example:
[ml2_mech_pica_switch:192.168.0.250]
te-1/1/1=physnet1:dev-1,dev-2,dev-3
te-1/1/2=physnet2:dev-4
te-1/1/3=physnet1:project_name,admin,vni,3535
ovsdb_port=6640
source_ip=192.168.0.80
修改/usr/lib/systemd/system/neutron-server.service文件,在${DAEMON_ARGS}字段添加pica8的引导配置,需要停止neutron-server服务并systemctl daemon-reload。
--config-file=/etc/neutron/plugins/ml2/ml2_conf_pica8.ini
修改/etc/neutron/plugins/ml2/ml2_conf.ini,如下。
type_drivers = vlan,vxlan project_network_types = vxlan mechanism_drivers = pica8,openvswitch
Make sure the is consistent in the following configuration
bridge_mappings=
安装python-ovs库。
yum install -y python-pip pip install ovs
运行如下命令创建pica8插件数据库动作。
neutron-db-manage --config-file /etc/neutron/neutron.conf --config-file /etc/neutron/plugins/ml2/ml2_conf.ini revision -m "add pica8 mechanism driver" --expand
在生成的/usr/lib/python2.7/site-packages/neutron/db/migration/alembic_migrations/versions/newton/expand/94ca4fc9191b_add_pica8_mechanism_driver.py文件中添加如下内容。
def upgrade(): op.create_table( 'pica8_interfaces_v2', sa.Column('id', sa.String(length=36), nullable=False, primary_key=True), sa.Column('switch', sa.String(length=36), nullable=False), sa.Column('interface', sa.String(10), nullable=False) ) op.create_table( 'pica8_vlan_allocations_v2', sa.Column('id', sa.String(length=36), nullable=False, primary_key=True), sa.Column('project_id', sa.String(length=255), nullable=False), sa.Column('network_id', sa.String(length=36), nullable=False), sa.Column('segmentation_id', sa.Integer, nullable=False), sa.Column('vlan_id', sa.Integer, nullable=False), sa.Column('vm_reference', sa.Integer, nullable=False, default=0), sa.Column('interface_id', sa.String(length=36), nullable=True), sa.ForeignKeyConstraint(['interface_id'], ['pica8_interfaces_v2.id'], ondelete='CASCADE') ) def downgrade(): op.drop_table('pica8_interfaces') op.drop_table('pica8_vlan_allocations_v2')
执行如下命令升级数据库(如果失败请将最后参数替换为head)。
neutron-db-manage --config-file /etc/neutron/neutron.conf --config-file /etc/neutron/plugins/ml2/ml2_conf.ini upgrade 94ca4fc9191b
重启服务。
systemctl restart openstack-nova-api systemctl restart neutron-server
物理主机接入配置。
Edit the file /etc/neutron/plugins/ml2/ml2_conf_pica8.ini to contain the following content:
miniedit使用 Pica8手册 ODL手册 OpenDaylight with Openstack Guide OpenStack with NetVirt Installing OpenStack and OpenDaylight using DevStack https://wiki.opendaylight.org//blog/images/5/59/CloudIntegrationwithOpenStackOVSDBNetVirt.pdf


