跳转至

devices

裸金属笔记

裸金属相关,简单点就是尽量不用计算虚拟化。


动手做自己的Nitro SmartNIC(FPGA/ARM-based Bare Metal Hypervisor(2021-02-25)

0. BackGround

裸金属服务很酷,甲方都想要,但是最好不要有绑定。BlueField 1/2、AWS Nitro、Aliyun X-Dragon MOC之类的智能网卡也不错,虽然ZStack已经纯软件实现了类似功能,但是这篇文章仍然会探索一个如何低成本(不到100块)的“智能网卡”方案(要不然前期的调研都白瞎了)。

做弹性裸金属并不难,但是要高性能的同时又要安全,而且在私有云、产品化的语境下,我们就需要好好思考一番了。

1. 功能定义

1.1. 带外管理

带外管理也不是个问题,如果:

  1. 服务器自带BMC。
  2. 你有能力让服务器厂商给你定制,因为你需要定制BIOS部分功能以让其在启动时认到智能网卡提供的虚拟设备。
  3. 自己做OpenBMC。

但是,由于多数用户没有让服务器厂商高度定制服务器的能力,因而我们需要在“无米”的状态下做“炊”。

1.1.1. 电源管理

通过“智能网卡”我们至少要能实现主机的开关机,这个相对来说还比较容易实现,无论何种主板,电源控制接口现在服务器上都有,若干个高/低电平就可以控制。

但是考虑到集群断电的情况,“智能网卡”要优先启动才能进一步控制它管理的物理机,所以这个设备我们一定要轻、快、稳。

如果使用服务器内PCIE供电,那么我们又要修改BIOS来保证智能网卡优先启动,但是这个。。。成本不止100块了。

所以考虑使用独立供电的嵌入式设备,无论使用插到服务器PCIE插槽上的ARM/FPGA/X86 SoC还是树莓派,我们都要给它独立供电。

1.1.2. 与主机通信

这里的通信仅仅涉及控制面的内容,数据面(网络、存储)不涉及。

我们尊重传统,仅考虑两种情况,即与主机OS通信和与主机设备通信。

前者一个agent走TCP/IP就能搞定,后者我们需要与主板的I3CI2C/SPI接口通信。

1.2. 设备模拟/透传

存储

存储侧我们目前可以直接提供的baremetal设备有 SCSI(iSCSI)、NVMe(oF)、VirtIO等。

由于产品化必须考虑到适配各种硬件的问题,所以我们不会定制修改BIOS,这里只要一个小小的trick即可让服务器从智能网卡提供的vda或者其他接口的“虚拟”硬盘启动,从而保证云平台存储资源可以以较高性能提供给baremetal。

Option Rom

Option Rom 也是智能网卡带的选项了,启动后可以直接认到virtio/nvme的虚拟硬盘。

网络

网络多数情况下是问题但又不是问题,我们选择智能网卡的原因是因为它可以解决大多数问题。虚拟网络资源直接给物理机的目的可以很容易地通过SDN交换机实现,但是我们既然用了一个智能网卡设备那么就应该通过它来回避各种外部环境仍然需要定制的问题。以BF2为例,它内部集成的ovs-dpdk以及Mellanox传统的内部虚拟交换技术加持,我们可以给baremetal一个“虚拟”接口,但是所有流量都在云平台的管控下,用户极难自行修改。

如果不选择智能网卡,那么只有SDN交换机和系统内SDN两种方案,SDN交换机甚至比智能网卡的适配都简单,技术不是难点,同智能网卡一样你很难说服客户的采购来一套裸金属专用的SDN交换机,更不要说这个交换机不在他们的网工管辖范围内了。

那么只剩系统内的overlay网络接入方案了,Linux一直不是问题,Windows系统需要agent做一些小工作才可以,即使用户自己改了,我们也可以“内挂”anti-spoofing。

1.3. Hypervisor模拟

“智能网卡”中要模拟hypervisor,这里的模拟是为了让多数云平台的agent比如libvirt或者基于libvirt的定制agent能够对弹性裸金属设备的调用行为与虚拟机保持一致。为什么要做这个工作呢,我单独的控制面不行吗?

也行,但是不酷,更何况你后续的存储与网络设备不仅给裸金属也要给虚拟机,两套API两套数据库管理同一个网络/存储就是在给云平台的管控面开发找事儿。

所以这个我们一般要对agent(libvirt)做一些修改,这个难度相比下来不大。

2.1. Proof of Concept

2.1. ARM or X86作为智能网卡

如果使用ARM或者X86主机作为“智能网卡”,那么存储方案有iSCSI和NVMe-over-TCP,网络方案目前看只有系统内SDN的方法了,好处在于“智能网卡”的门槛低。

我们先做一个OpenBMC的原型机,准备如下材料:

笔记本; 树莓派/NVIDIA Jeston; 视频采集卡; 杜邦线; 网线; rtl-sdr(谁能拒绝一个可以听广播看电视的裸金属呢);

当然,一台服务器也是必要的。。。不会吧,你家里连台服务器都没有?你还做锤子钢铁侠哦?赶紧上咸鱼500块买个二手服务器吧,不想做钢铁侠了还可以卖掉。

算了,毕竟太吵,一个ATX或者其他类型主板的台式机就可以了。

TBD

2.2. FPGA ARM SoC作为智能网卡(有点小贵,1000多块,但是来都来了)

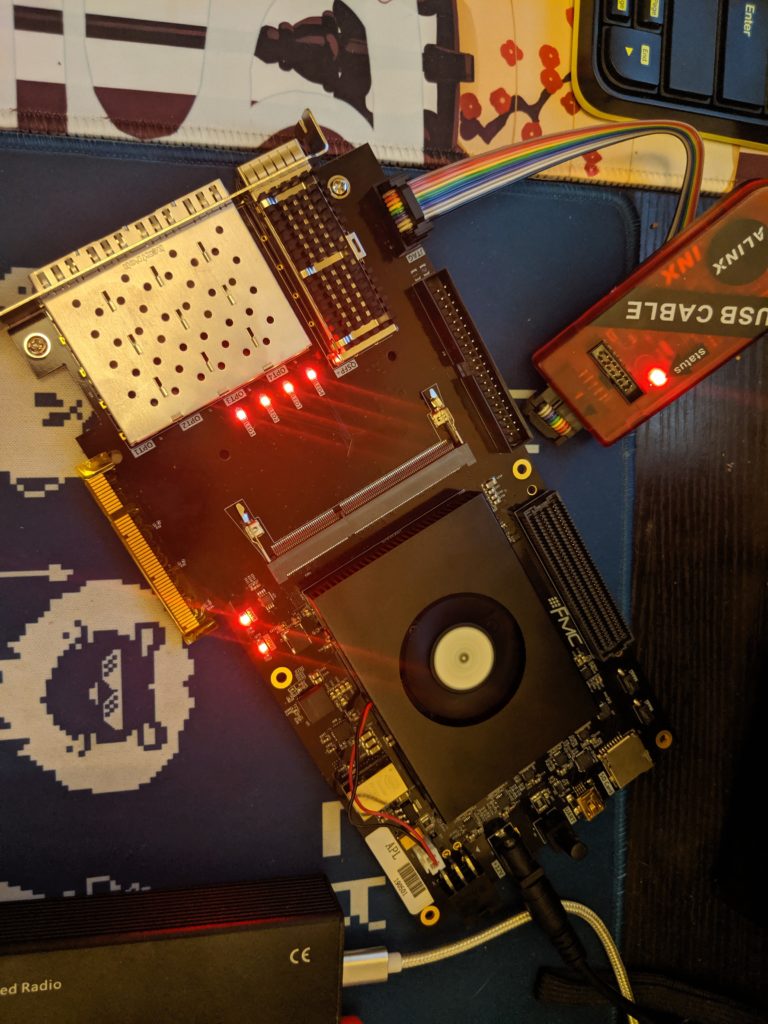
1000多一块的有PCI-E插槽的Xilinx ARM SoC开发版,贵,但是你可以基于PCI/PCI-E接口实现独立的网络、存储,非常有意思,但是难度在于FPGA编程。

不过还好,我们先尝试用Pynq写一些简单的PCI/PCI-E通信,然后再堆上复杂的,但是中间会有很多IP我们要购买,没钱怎么整,社区找现成的,low点,能用。

因为我们的目标是要基于这个FPGA实现存储和网络设备的接入,那么总归是一个大点的工程,如果做的先进点实现virtio网络/存储的接入,那对于提供虚拟化的云平台将善莫大焉。


"Windows中使用overlay网络的一些方案" "2020-05-21"

引言

21世纪了,智能网卡还是贵,交换机客户没法直接买,软件技术栈都好找,性能再加强,ebpf不错,要是Windows的Linux子系统里支持这个那软裸金属方案至此可以画上一个句(分)号了。

关于如何在Windows裸金属中给用户交付流畅且易配置的云平台overlay网络,从而跟虚拟化打通,也是个最近要考虑的点。

SDN交换机与智能网卡

我们可以用国内品牌,他们也提供ovs接口,but,对于小体量的客户或者采购严格的客户就很难,仅适合自有IDC且有决心的客户。

为了使用一个功能,软件绑定就算了,硬件你还要我买你的,固定资产无法二次利用,别想了。

GRE/VXLAN(Windows)

Windows从08/12后自带了NVGRE,VXLAN的话是从16开始支持,听起来也不错,所以这个对于新晋用户是可以接受的

OVS

Windows下有ovs,但是仅支持2012后的,这样就没法解决Windows2008的问题(再过几年就不用操心这个问题了),当然主要的问题还是没有官方背书。


"使用Xilinx/Intel FPGA加速虚拟化" "2019-04-29"

UPDATE: 老王的笔记中也总结了一些关于devconf的内容。

This article is just a collection of ideas and posts.

Recently I was doing some performance-tunning of QEMU/KVM with kinds of pure-software ways. However, it ended with the existence of QEMU/KVM's process load.

I just remembered that I used to do some co-sim work with National Instruments LabView about ten years ago...(during college life...fk...I'm still young...)

Trial No.1

TBD: Start QEMU instance(s) with passthrough-ed PCI(PCI-SRIOV) devices like ethernet controller or NVMe controller designed in PCI FPGA to offload the emulated works.

Trial No.2

TBD: Start QEMU instance with devices ported to passthrough-ed PCI FPGA as many as possible, i.e. usb controller, ethernet controller and etc..(Like a dock with kinds of devices...)

But I think it will be replaced by Trial No.1.

Trial No.3

TBD: Co-Sim.

Trial No.4

SoC FPGA, as DOM0.

Trial No.5

ASIC offload with slight host management.

References

[1] Running Xilinx in QEMU, https://xilinx-wiki.atlassian.net/wiki/spaces/A/pages/18842060/QEMU

[2] Building Xen Hypervisor with Petalinux 2019.1, https://xilinx-wiki.atlassian.net/wiki/spaces/A/pages/99188792/Building+Xen+Hypervisor+with+Petalinux+2019.1

[3] QEMU SystemC and TLM CoSimulation, https://xilinx-wiki.atlassian.net/wiki/spaces/A/pages/18842109/QEMU+SystemC+and+TLM+CoSimulation


"Windows中使用eBPF" "2022-02-10"

背景

也挺有意思的,前年念叨着Windows内的SDN方案咋做,去年微软终于就搞了个eBPF for Windows,如此以来结合Windows新版本自带的NVGRE/VxLAN网络,安全组、EIP、LB啥的在纯软裸金属里都好说了。

另外,迫于适配智能与半智能网卡的压力,ZStack已经提供了ovs与linux bridge两个技术栈的网络(新建集群的时候可以选,虽然不是第一个但早些时候收到的需求确实不硬开发也忙。。),所以现在看起来一切都很合理。

当然,产品的东西跟新技术并不是什么强绑定关系,技术只是锦上添花实现产品的工具,稳定优先。

测试

编译eBPF for Windows

测试程序

VxLAN/NVGRE集成


title: "Xilinx FPGA中应用P4网络数据面编程" date: 2019-07-11 categories: - "cloud-infra" - "devices"


0. Background

As we all know, P4 is about to be the future of OpenFlow 2.0, and to achieve an totally software defined network with programmable control plane and data plane.

1. Basic Knowledge

Since we've got P4 working on X86 server

In SDN controller ONOS.

2. Software/Hardware Plant

2.1. Pureway: P4 bitstream

2.2. Easyway: P4 on PetaLinux

3. Further Exploration

软件定义无线电(SDR)的设备、软件与应用指南

注意:本文内容仅限于实验室安全测试目的,禁止用于任何商业或违反当地法律法规的活动。

不管是较贵的Ettus还是入门的HackRF,抑或是最初级的RTL-SDR设备,都可以使用这篇教程中的绝大部分内容。

GRCon2019

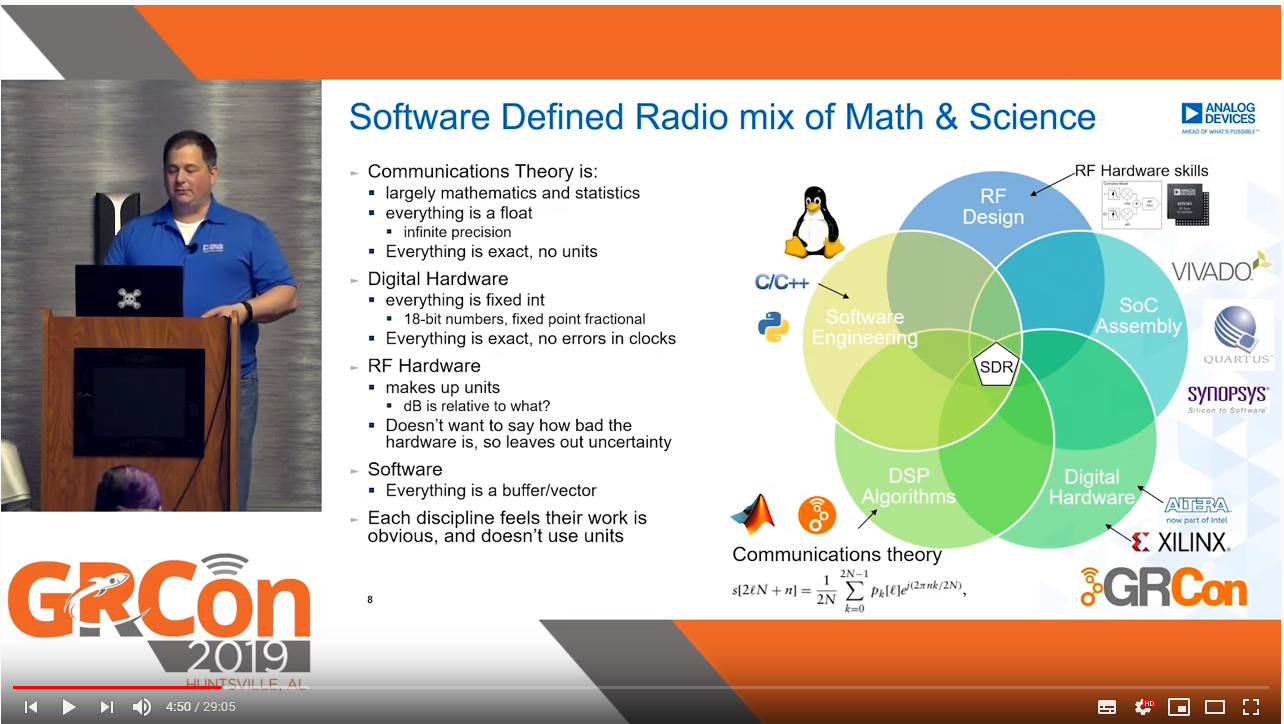
https://www.gnuradio.org/grcon/grcon17/presentations/

https://www.gnuradio.org/grcon/grcon18/presentations/

https://www.gnuradio.org/grcon/grcon19/presentations/

https://github.com/mossmann/hackrf/wiki

https://www.hackrf.net/hackrf%E4%B8%8Egnuradio%E5%85%A5%E9%97%A8%E6%8C%87%E5%8D%97/

http://www.hackrf.net/faq/

https://wiki.myriadrf.org/LimeSDR

https://myriadrf.org/news/limesdr-made-simple-part-1/

雪碧0xroot的PPT

0. 环境准备

0.1 硬件

HackRF One Ettus B200 Ettus B210 BladeRF x40 LimeSDR LimeSDR mini
Frequency Range 1MHz-6GHz 70MHz-6GHz 70MHz-6GHz 300MHz-3.8GHz 100kHz-3.8GHz 100kHz-3.5GHz
RF Bandwidth 20MHz 61.44MHz 61.44MHz 40MHz 61.44MHz 30.72MHz
Sample Depth 8 bits 12 bits 12 bits 12 bits 12 bits 12 bits
Sample Rate 20MSPS 61.44MSPS 61.44MSPS 40MSPS 3.2MSPS 61.44MSPS
Transmitter Channels 1 1 2 1 2 1
Receivers 1 1 2 1 2 1
Duplex Half Full Full Full Full Full
Interface USB 2.0 USB 3.0 USB 3.0 USB 3.0 USB 3.0 USB 3.0
Programmable Logic Gates 64 macrocell CPLD 75k 100k 40k (115k avail) 40k 40k
Chipset MAX5864, MAX2837, RFFC5072 AD9364 AD9361 LMS6002M LMS7002M LMS7002M
Open Source Full Schematic, Firmware Schematic, Firmware Schematic, Firmware Full Full
Oscillator Precision +/-20ppm +/-2ppm +/-2ppm +/-1ppm  +/-1ppm initial
+/-4ppm stable  +/-1ppm initial

+/-4ppm stable | | Transmit Power | -10dBm+ (15dBm @ 2.4GHz) | 10dBm+ | 10dBm+ | 6dBm |  0 to 10dBm | 0 to 10dBm | | Price | 249€ euros VAT Exc. | 991€ euros VAT Exc. | 1658€ euros VAT Exc. | 625€ euros VAT Exc. | 332€ euros VAT Exc. | 190€ euros VAT Exc. |

0.2 驱动

0.3 软件

https://unicorn.360.com/blog/2017/04/12/LimeSDR-Getting-Started-Quickly/

https://oneguyoneblog.com/2016/09/15/sdrsharp-sdr-installing-windows-10/

下载SDR#后,重启按F7进入“禁用驱动签名”的运行模式,运行其中的install-rtlsdr.bat,替换第0个驱动

1. 接收信号

接收信号建议使用gqrx(MacOS、Linux),也可以用sdrsharp(Windows)。

https://www.rtl-sdr.com/big-list-rtl-sdr-supported-software/

$ port info gqrx

$ sudo port install gqrx

接收信号以后,你可以做的内容就比较多了,这里我会举一些比较有意思的例子。

1.1. 听广播/看电视

http://dalvikplanet.blogspot.com/2017/03/how-to-get-working-rtl2832u-r820t2-on.html

1.2. 接收气象云图

SDR软件

虚拟声卡

WXtoimg

gpredict/orbitron

https://www.rtl-sdr.com/rtl-sdr-tutorial-receiving-noaa-weather-satellite-/blog/images/

https://wischu.com/archives/528.html

GSM嗅探

https://www.cnblogs.com/k1two2/p/7000942.html

1.3. 接收GPS信息

https://swling.com/blog/2016/04/guest-post-using-the-hackrf-one-for-dgps-beacon-reception/

http://sdrgps.blogspot.com/2016/12/rtl-sdr-to-orbit-with-limesdr.html

1.4. 方向探测与被动雷达 Direction Finding and Passive Rador

https://www.rtl-sdr.com/ksdr/

1.5. 接收whatever you want LEGALLY

zigbee https://github.com/bastibl/gr-ieee802-15-4

https://github.com/BastilleResearch/scapy-radio/tree/master/gnuradio/gr-zigbee

2. 发送信号

2.1. 发送GPS信号

https://gist.github.com/gyaresu/343ae51ecbb70486e270

https://www.cnblogs.com/k1two2/p/5477291.html#4245780

https://gorgias.me/2017/07/30/HackRF-GPS-%E6%AC%BA%E9%AA%97/

https://github.com/osqzss/LimeGPS

2.2. 发送文字/音视频

Windows软件sdrangel

http://gareth.codes/hackrf-transmit/

https://github.com/fsphil/hacktv

http://www.irrational.net/2014/03/02/digital-atv/

http://www.hackrf.net/2014/06/hackrf_nbfm_tx_n_ctcss_squelch/

http://www.xn--hrdin-gra.se/blog/wp-content/uploads/2015/08/nbfm-tx.grc

https://gist.github.com/gyaresu/343ae51ecbb70486e270

https://nuclearrambo.com/wordpress/transferring-a-text-file-over-the-air-with-limesdr-mini/

https://github.com/martinmarinov/TempestSDR

3. 收发信号

GSM

https://www.evilsocket.net/2016/03/31/how-to-build-your-own-rogue-gsm-bts-for-fun-and-profit/

https://yatebts.com/open_source/

https://cn0xroot.com/2017/01/10/iot-mode-fuzzing-with-openbt/

LTE

https://yq.aliyun.com/articles/310348

https://www.cnblogs.com/k1two2/p/5666667.html

https://cn0xroot.com/2017/04/12/limesdr-getting-started-quickly/

OpenBTS+LimeSDR

Prepare:

Ubuntu Desktop 16.04 & LimeSDR 1.4s with LimeSuite 17.12(If not, OpenUSRP will fail.)

Install build-essential packages

packages for soapysdr available at myriadrf PPA

sudo add-apt-repository -y ppa:myriadrf/drivers sudo apt-get update

install core library and build dependencies

sudo apt-get install -y git g++ cmake libsqlite3-dev

install hardware support dependencies

sudo apt-get install -y libsoapysdr-dev libi2c-dev libusb-1.0-0-dev

install graphics dependencies

sudo apt-get install -y libwxgtk3.0-dev freeglut3-dev

Install for building uhd

sudo apt-get install libboost-all-dev libusb-1.0-0-dev python-mako doxygen python-docutils cmake build-essential

Change to UHD driver via uhd

$ cd ~ # build and install limesuite $ git clone https://github.com/myriadrf/LimeSuite.git $ cd LimeSuite $ mkdir builddir && cd builddir $ cmake ../ $ make -j4 $ sudo make install $ sudo ldconfig

$ cd ~ # build uhd, install, enable lime, rebuild $ git clone https://github.com/EttusResearch/uhd.git $ cd uhd/host/ $ mkdir build && cd build $ cmake ../ $ make -j4 $ sudo make install $ git clone https://github.com/jocover/OpenUSRP.git lib/ursp/OpenUSRP # DO NOT GO OUT $ echo "INCLUDE_SUBDIRECTORY(OpenUSRP)">>lib/ursp/CMakeLists.txt $ cmake ../ $ make -j4 $ sudo make install

Or, Change to UHD driver via SoapySDR

$ git clone https://github.com/pothosware/SoapySDR $ cd SoapySDR $ mkdir builddir;cd builddir; cmake ../ $ make -j4 $ sudo make install

$ git clone https://github.com/myriadrf/LimeSuite $ cd LimeSuite

Build OpenBTS

4. SDR

软件定义无线电的内容即是可以灵活定义信号的处理过程,比如输出到TCP/UDP、文字音视频解码等。其中比较有名的有GNURadio、SoapySDR、Pothos(IDE)等(这里以GNURadio为例)。推荐在Linux中安装,当然也可在MacOS或者Windows中使用MacPorts进行安装,除此之外,也有PyBombs可选。

在MacOS中安装需要使用MacPorts、XQuartz,MacPorts安装内容如下。

$ port info gnuradio $ sudo port install gnuradio+wxgui gr-osmosdr sox $ port content gnuradio $ sudo port install hackrf $ sudo port install rtl-sdr $ sudo port search gr- # if you wanna more modules in gnuradio, don't be shy

然后打开XQuartz,将/opt/local/bin/gnuradio-companion加入到X自定义应用程序菜单中(建议修改默认的X终端程序内容为_xterm -e "source ~/.bash_profile;/bin/bash"_)。

https://greatscottgadgets.com/sdr/

https://gist.github.com/machinaut/addf3438ef0c1a9cad38

https://osmocom.org/projects/gr-osmosdr/wiki/GrOsmoSDR#RTL-SDRSource

https://pypi.org/project/pyrtlsdr/#description

NVIDIA Jetson使用指导

本文将以NVIDIA Jetson为硬件基础,为你展现NVIDIA的力量,可以将其作为Jetson Nano的入门参考手册(教程)。

1. 入门篇

入门篇的有两章内容,来自NVIDIA JETSON包装盒自带的内容。

1.1. 准备环境

Ref.1: https://developer.nvidia.com/embedded/learn/get-started-jetson-nano-devkit

Ref.2: https://developer.nvidia.com/embedded/downloads

这里我使用的是一个Jetson Nano开发板,起初我以为随便一个USB数据线就能把它跑起来,但是我想多了。18W的快充头插上后可以正常启动,但是一旦运行比如WebGL测试的页面直接就关机了,因而我把小米音箱的电源适配器(5V2A)给它用了,还真能跑的动。

但是为了接下来的内容,我特意买了一个5V4A的5.5mm OD的电源适配器,要不然以我现在的环境很难保证能过了接下来的准备环境阶段。

要使用这个板子,你需要提前下载SDK的SD卡镜像,以及Host OS(PC,Ubuntu 18.04)所需的SDK Manager

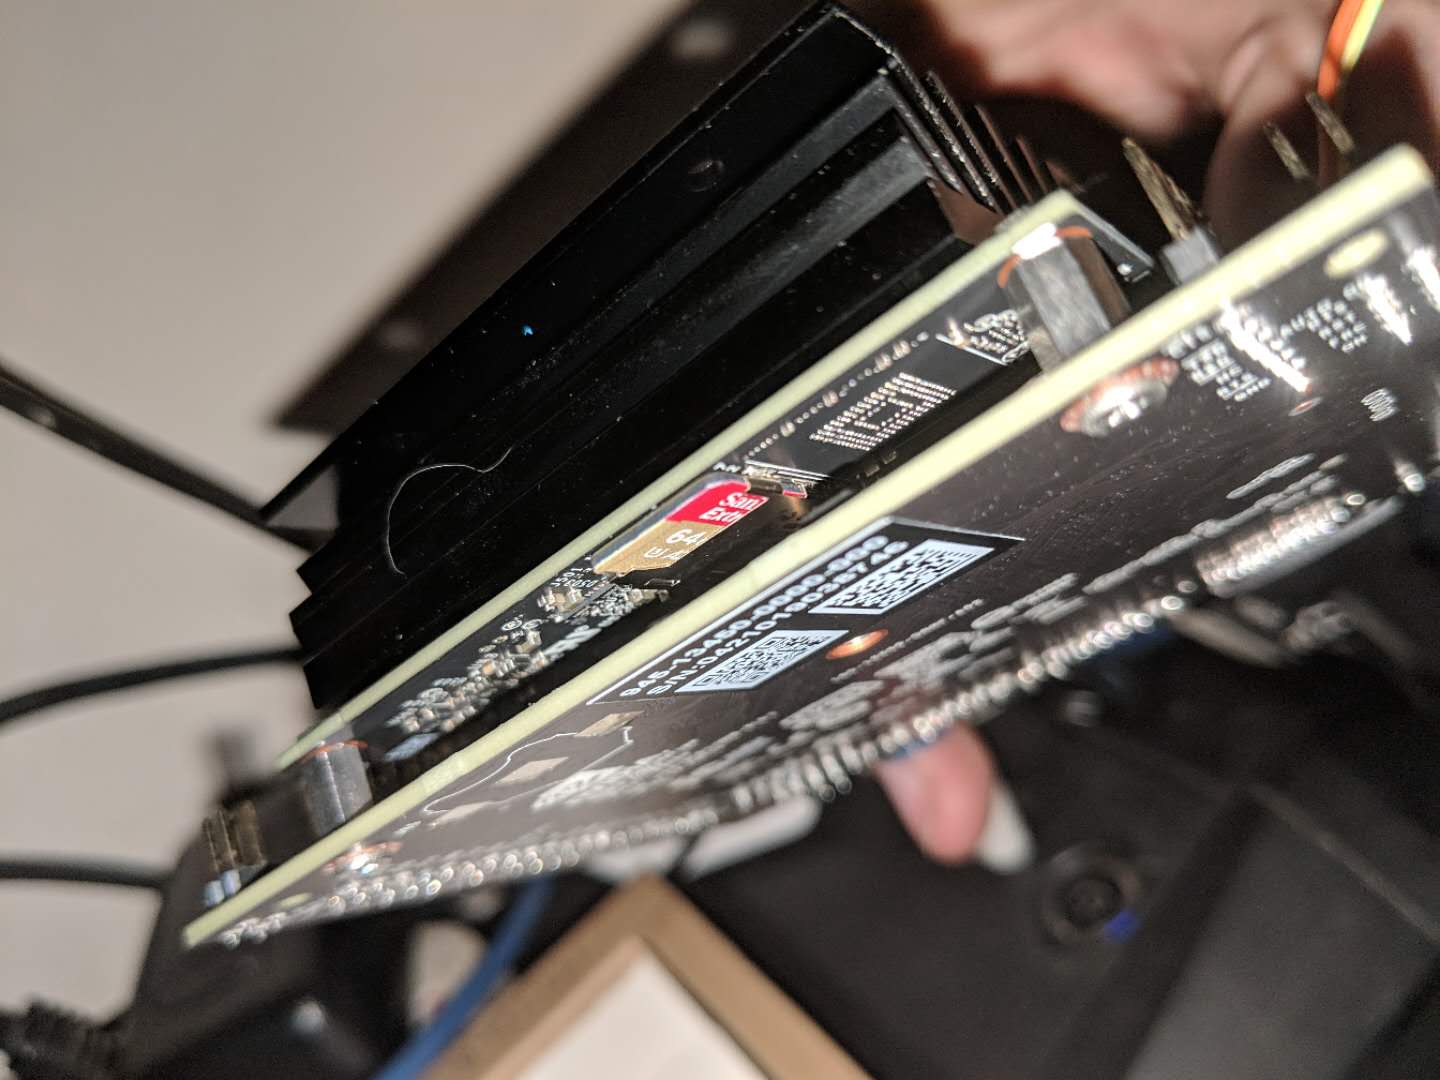
下载完成之后,从Ref.1的链接中下载所需的镜像烧录软件或者别的烧录软件也行,将SD卡镜像烧录至TF卡中(这里我使用的是64G TF卡,A2)。烧录完毕将其插入核心板下面的卡槽中(有些不好找),见下图。
然后通过HDMI/DP线将之与显示器连接(启动阶段的分辨率需要修改,要不然小点的屏幕没法显示启动logo,这个不是重点以后再说),插上蓝牙USB键鼠,接入USB电源,你就可以看到信仰之NVIDIA logo。
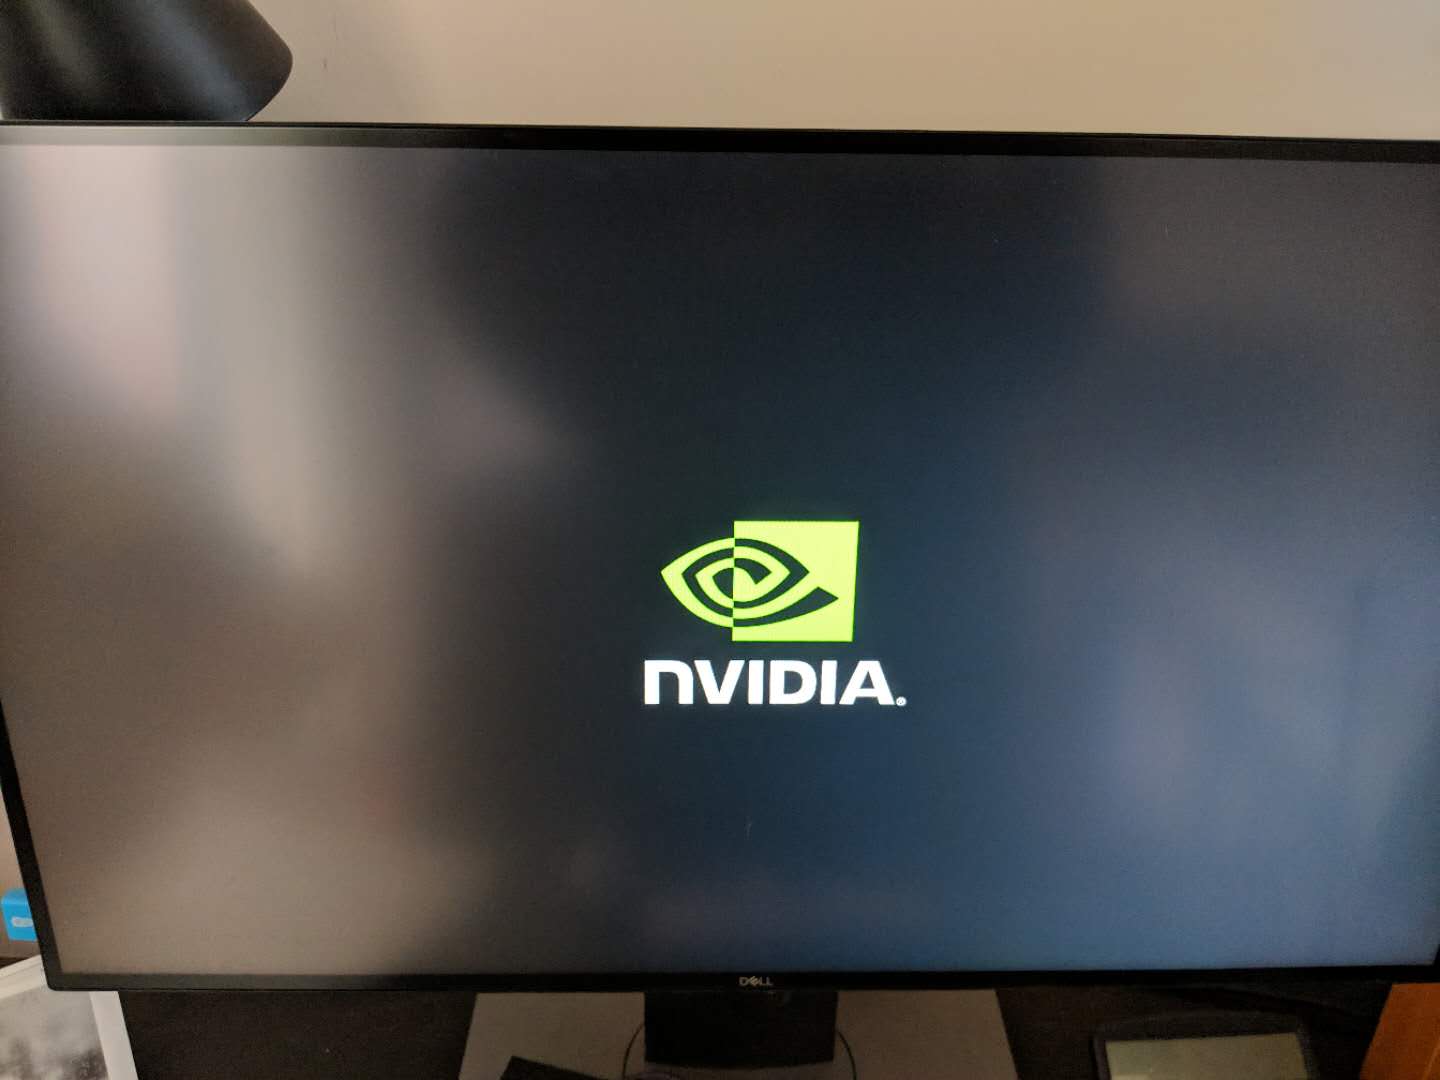
这里你需要等它初始化完成,初始化工作包括扩展跟文件系统、解压乱七八糟的包之类的,总之等看到Ubuntu Desktop的安装配置界面后可以开始操作了。

进入桌面后的第一件事儿,可以先打开Chromium,访问WebGL的示例网站,随便开个demo试试会不会关机,如果关机那么恭喜你可以找个正经的USB电源了(Ref.1里有Adafruit的USB和DC电源适配器购买链接)。

当你的DC电源到了以后,先不要直接插上,因为需要设置一下跳线,如图所示。
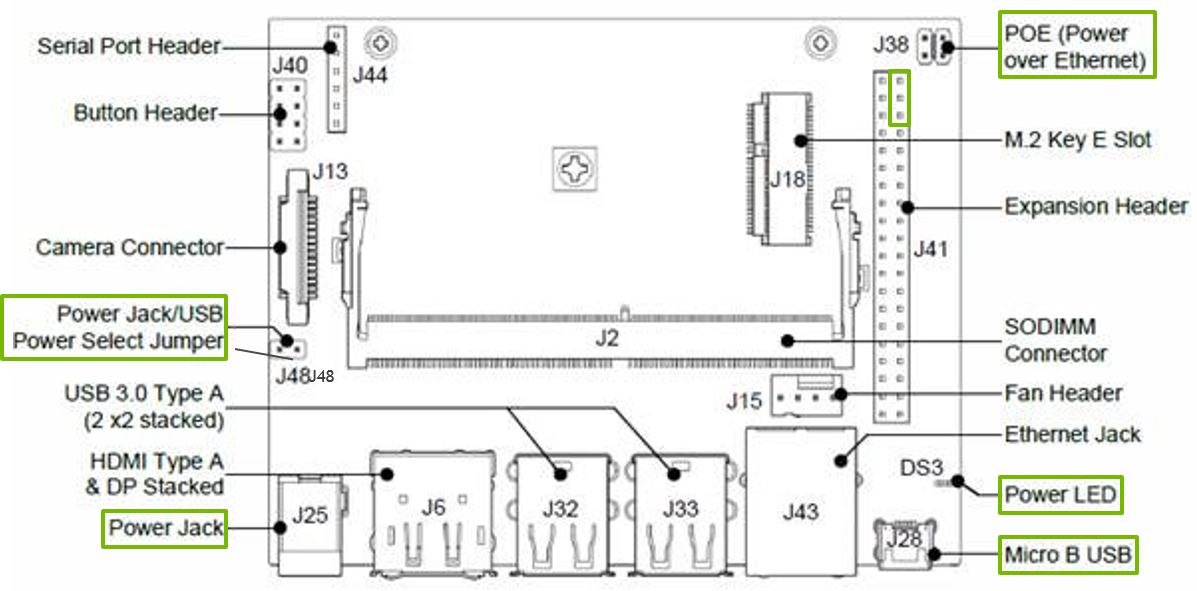
看到Power Jack/USB Jumper没,由于我手里没有跳线帽,所以我直接短接了它们,如图所示(看我意念焊接术)。
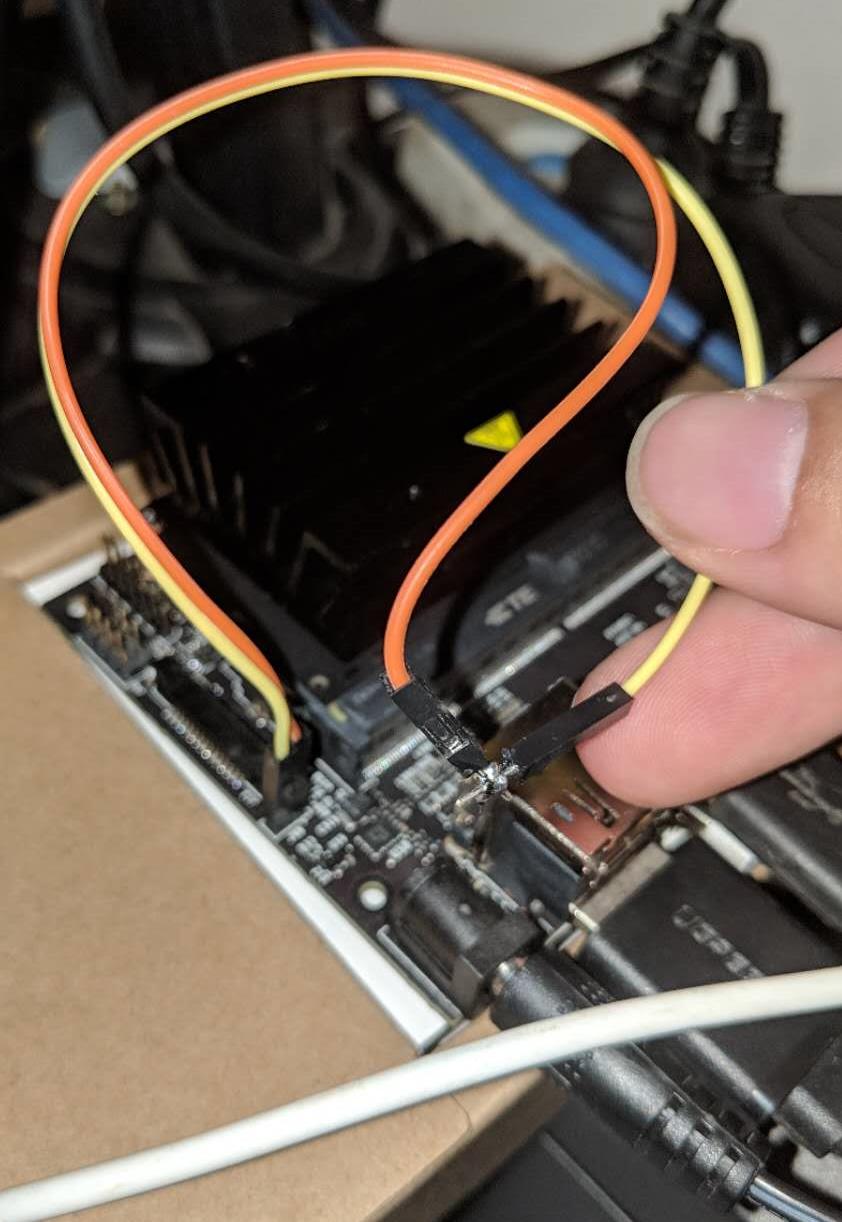
然后再插上刚入手的DC 5V4A,即可空出你的USB并将之与Host PC相连了。

1.2. 准备SDK

这一节你可以先跳过去,等跑完下面的小节后再看,因为这部分并不影响接下来的操作。

准备SDK的内容主要包括:下载安装Host PC、开发板所需CUDA、OpenCV之类的,需要开发板的USB连接到Host PC上作数据连接用(我没有尝试过那个USB口既作电源又作数据传输)。
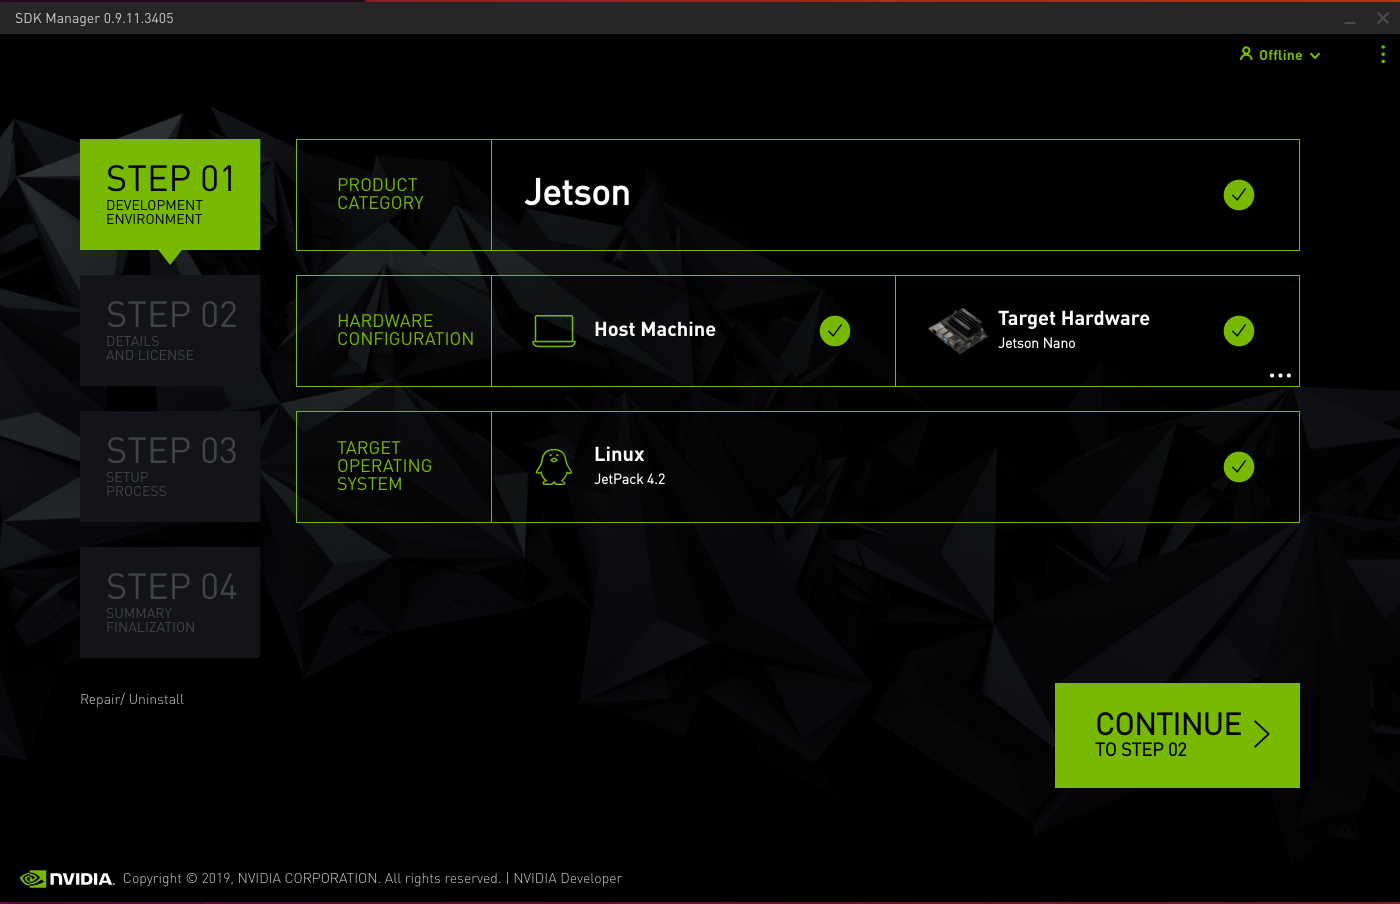
这里我并不打算过多介绍,只要按照引导进行操作即可。

1.3. Hello AI World

这个示例为你充分避开了各种依赖库的复杂安装步骤以及非常多的专业术语,对新手较为友好,但是我会仍会将其以链接形式展现,在最后章节的连接中。

第一步,从Hello World开始,你仍然需要最基础的工具。

$ sudo apt install git make cmake $ git clone https://github.com/dusty-nv/jetson-inference $ cd jetson-inference $ git submodule update --init $ mkdir build $ cd build $ cmake ../ $ make -j4 $ sudo make install $ cd aarch64/bin

这一顿操作后,你会拥有个Hello AI World的全部成果。但是,what the hell an I doing?

来,对于一些Linux不熟悉的同学来说只要知道这里的cmake与make是编译源码的指令就行,cmake用来生成Makefile,make会根据Makefile里定义的动作调用gcc开始编译。

然后让我们看第一个例子,使用ImageNet的图片素材来训练我们的“机器人”让它能够识别各种物体,其中你会看到当前目录下有两个imagenet开头的文件,让我们从imagenet-console开始。

在图形界面上打开终端后,执行如下命令。

$ ./imagenet-console orange_0.jpg output_0.jpg $ nautilus .

然后经过机器人的推理以后,你会得到一张橘子、另一张还是橘子的图片,并且新橘子图片的左上角标识了机器人认为它有多大概率是橘子。
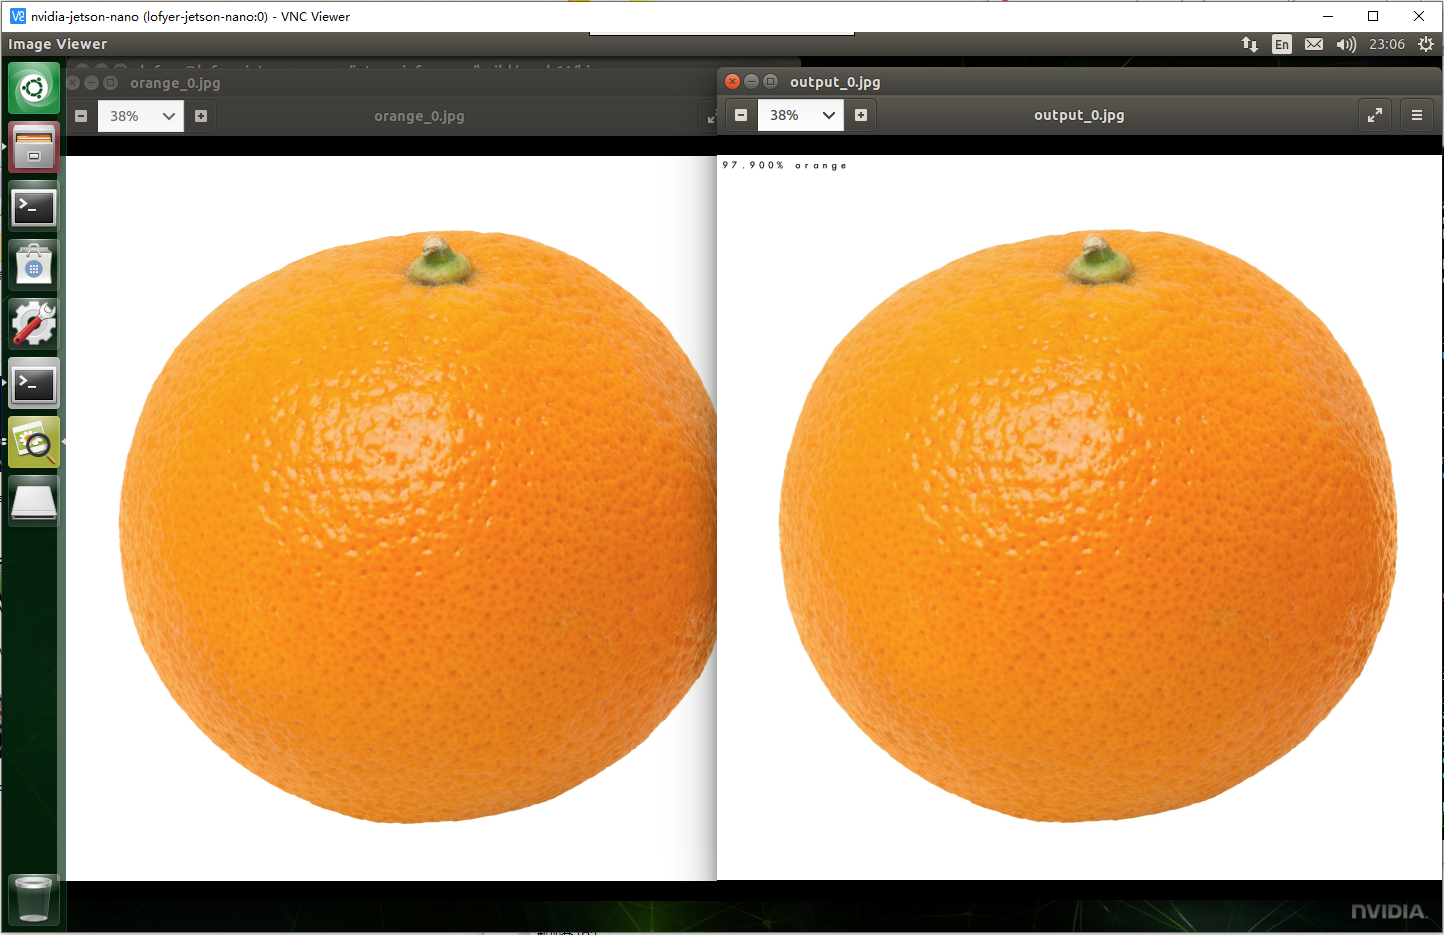
是不是有感觉了?OK,我们继续。

既然它可以看图片,那么它当然也可以看视频或者摄像头中的内容,那么接下来我们让它看到摄像头中的橘子试试。

这里我需要给Jetson Nano接一个USB摄像头,接入以后可以在终端键入cheese打开拍照应用程序看它是否工作。

然后终端中运行如下命令。

./imagenet-camera

Oops,segmentation fault了,如文档所说,默认的摄像头是板载CSI摄像头,所以这里需要修改代码让它使用后来插入的USB摄像头。

$ vi ../../../imagenet-camera/imagenet-camera.cpp

...

include "imageNet.h"

define DEFAULT_CAMERA 0 // -1 for onboard camera, or change to index of /dev/video V4L2 camera (>=0)

bool signal_recieved = false; ...

将DEFAULT_CAMERA修改为0以后,便会启用/dev/video0路径上的摄像头,然后重新编译。

$ cd ../../ # build $ cmake ../ $ make -j4

然后进到bin目录下再运行一次imagenet-camera即可。

PS:不是所有的摄像头都叫罗技C920,由于摄像头原生编码的问题,可能会导致上述程序黑屏,那么我们需要是适当修改一些内容。笔者暂时跳过这里,等改好以后再看。关于兼容列表可以参考eLinux的链接

1.4. 写一个小程序

如果你跟着github的教程,那么应该到你自己写一段代码的时间了,直接粘贴吧。

// include imageNet header for image recognition

include

// // include loadImage header for loading images

include

int main( int argc, char** argv ) { // a command line argument containing the image filename is expected, // // so make sure we have at least 2 args (the first arg is the program) if( argc < 2 ) { printf("my-recognition: expected image filename as argument\n"); printf("example usage: ./my-recognition my_image.jpg\n"); return 0; }

// retrieve the image filename from the array of command line args const char* imgFilename = argv[1]; float* imgCPU = NULL; // CPU pointer to floating-point RGBA image data float* imgCUDA = NULL; // GPU pointer to floating-point RGBA image data int imgWidth = 0; // width of the image (in pixels) int imgHeight = 0; // height of the image (in pixels)

// load the image from disk as float4 RGBA (32 bits per channel, 128 bits per pixel) if( !loadImageRGBA(imgFilename, (float4**)&imgCPU, (float4**)&imgCUDA, &imgWidth, &imgHeight) ) { printf("failed to load image '%s'\n", imgFilename); return 0; } imageNet* net = imageNet::Create(imageNet::GOOGLENET);

if( !net ) { printf("failed to load image recognition network\n"); return 0; } float confidence = 0.0; const int classIndex = net->Classify(imgCUDA, imgWidth, imgHeight, &confidence); if( classIndex >= 0 ) { // retrieve the name/description of the object class index const char* classDescription = net->GetClassDesc(classIndex); // print out the classification results printf("image is recognized as '%s' (class #%i) with %f%% confidence\n", classDescription, classIndex, confidence * 100.0f); } else { // if Classify() returned < 0, an error occurred printf("failed to classify image\n"); } delete net; // this is the end of the example! return 0; }

require CMake 2.8 or greater

cmake_minimum_required(VERSION 2.8)

declare my-recognition project

project(my-recognition)

import jetson-inference and jetson-utils packages.

note that if you didn't do "sudo make install"

while building jetson-inference, this will error.

find_package(jetson-utils) find_package(jetson-inference)

CUDA and Qt4 are required

find_package(CUDA) find_package(Qt4)

setup Qt4 for build

include(\({QT\_USE\_FILE}) add\_definitions(\))

compile the my-recognition program

cuda_add_executable(my-recognition my-recognition.cpp)

target_link_libraries(my-recognition jetson-inference)

然后编译并运行。

$ cmake . $ make $ ./my.cpp polarbear.jpg

输出结果如下。

[cuda] cudaAllocMapped 5089520 bytes, CPU 0x100c30000 GPU 0x100c30000

imageNet -- loading classification network model from: -- prototxt networks/googlenet.prototxt -- model networks/bvlc_googlenet.caffemodel -- class_labels networks/ilsvrc12_synset_words.txt -- input_blob 'data' -- output_blob 'prob' -- batch_size 2

[TRT] TensorRT version 5.0.6 [TRT] detected model format - caffe (extension '.caffemodel') [TRT] desired precision specified for GPU: FASTEST [TRT] requested fasted precision for device GPU without providing valid calibrator, disabling INT8 [TRT] native precisions detected for GPU: FP32, FP16 [TRT] selecting fastest native precision for GPU: FP16 [TRT] attempting to open engine cache file /usr/local/bin/networks/bvlc_googlenet.caffemodel.2.1.GPU.FP16.engine [TRT] loading network profile from engine cache... /usr/local/bin/networks/bvlc_googlenet.caffemodel.2.1.GPU.FP16.engine [TRT] device GPU, /usr/local/bin/networks/bvlc_googlenet.caffemodel loaded [TRT] device GPU, CUDA engine context initialized with 2 bindings [TRT] binding -- index 0 -- name 'data' -- type FP32 -- in/out INPUT -- # dims 3 -- dim #0 3 (CHANNEL) -- dim #1 224 (SPATIAL) -- dim #2 224 (SPATIAL) [TRT] binding -- index 1 -- name 'prob' -- type FP32 -- in/out OUTPUT -- # dims 3 -- dim #0 1000 (CHANNEL) -- dim #1 1 (SPATIAL) -- dim #2 1 (SPATIAL) [TRT] binding to input 0 data binding index: 0 [TRT] binding to input 0 data dims (b=2 c=3 h=224 w=224) size=1204224 [cuda] cudaAllocMapped 1204224 bytes, CPU 0x101310000 GPU 0x101310000 [TRT] binding to output 0 prob binding index: 1 [TRT] binding to output 0 prob dims (b=2 c=1000 h=1 w=1) size=8000 [cuda] cudaAllocMapped 8000 bytes, CPU 0x101440000 GPU 0x101440000 device GPU, /usr/local/bin/networks/bvlc_googlenet.caffemodel initialized. [TRT] networks/bvlc_googlenet.caffemodel loaded imageNet -- loaded 1000 class info entries networks/bvlc_googlenet.caffemodel initialized. class 0296 - 1.000000 (ice bear, polar bear, Ursus Maritimus, Thalarctos maritimus) image is recognized as 'ice bear, polar bear, Ursus Maritimus, Thalarctos maritimus' (class #296) with 100.000000% confidence

简言之,程序使用ImageNet的图片配上GoogleNet的模型对你的图片进行推理,然后得出它认为这是北极熊的可能性。

因为这篇文章的目的是入门,也就是带进来以后看哪个方向就自己看,所以相关数学知识在这里已经忽略了,如果你能写出厉害的理论paper又做出很厉害的工程实现,那么大牛就请继续往下过,顺便留个言交个朋友让我膜拜一下。你也可以查看文末的链接进一步扩展阅读什么是GoogleNet,什么是CNN,然后撸一遍机器学习、深度学习、强化学习啥的,也可能一路懵懂复习到信号与系统、高等数学,你要书的话我这还卖,另外我的学习笔记可以参阅DataNote

2. 进阶篇

2.1. 重新训练模型

2.2. 作为推理节点

2.3. 深度学习实验

2.4. TensorFlow实验

安装TensorFlow

$ sudo apt-get install libhdf5-serial-dev hdf5-tools libhdf5-dev zlib1g-dev zip libjpeg8-dev $ sudo apt-get install python3-pip $ sudo pip3 install -U pip $ sudo pip3 install -U numpy grpcio absl-py py-cpuinfo psutil portpicker six mock requests gast h5py astor termcolor protobuf keras-applications keras-preprocessing wrapt google-pasta $ sudo pip3 install --pre --extra-index-url https://developer.download.nvidia.com/compute/redist/jp/v42 tensorflow-gpu==1.14.0+nv19.9

https://devtalk.nvidia.com/default/topic/1048776/official-tensorflow-for-jetson-nano-/

https://www.tensorflow.org/tutorials

with jupyter

2.5. TensorRT实验

3. 行业方案篇

太阳底下没有新东西,我发现把之前的笔记稍微整理点可以新开一个目录出一个系列,那么,这里我就直接写关键字吧,以后说不定又冒出什么新东西了呢。

在继续之前,我们需要抓住一样内容,即凡是人类自己通过观察、模仿、学习可以获得的重复能力,机器/深度/强化等内容理论来说都可以帮你实现,即使是创造力。

然后我们再讲方案,即在这个小小的盒子,它有多少能力,能干啥。

3.1. 边缘计算

工业现场

计算转移

CDN

军用头戴

3.2. 云游戏

4K/8K/HDR/60FPS家用主机、服务端

无主机头戴

3.3. 教学设备

甭管便宜的贵的只要带卡都能当教学设备,不信你看研究生论文有多少CUDA相关。

3.4. 残障辅助

手语翻译(https://github.com/EvilPort2/Sign-Language),可按照中国残联手语进行训练(http://www.cdpf.org.cn/special/zgsy/node_305701.htm)。

apt install python3-keras

辅助视觉(物体/人脸识别后转语音)

参考:

文献

[1] NVIDIA AI Two Days Demo: https://developer.nvidia.com/embedded/twodaystoademo

[2] CNN Architecture: https://medium.com/@sidereal/cnns-architectures-lenet-alexnet-vgg-googlenet-resnet-and-more-666091488df5

[3] eLinux: https://www.elinux.org/Jetson

术语

[1] ImageNet: http://image-net.org/download

[2] TensorRT: https://developer.nvidia.com/tensorrt

[3] DeepStream: https://developer.nvidia.com/deepstream-sdk

[4] cuDNN

[5] PyTorch

[6] NVDLA

title: "向NVIDIA Jetson Nano中移植QEMU-KVM" date: 2019-04-14 categories: - "cloud-infra" - "devices"


因为Jetson如果作为边缘设备,那么我们需要进一步探索虚拟化在其上的可能性,从而使FT有更容易的路线可走,还有既然它的芯片是PCIE的,那理应可以透传。

参考:https://elinux.org/Jetson/Nano/Upstream

什么build rootfs、uboot之类的就不要了,那是后期嵌入式的活,我们在现有环境上build kernel即可。

1. 准备环境

访问链接https://developer.nvidia.com/embedded/downloads并下载源码包,包括Jetson自有以及L4T源码,也可以点击如下链接直接下载。

https://developer.nvidia.com/embedded/dlc/l4t-sources-32-1-jetson-nano

解压其中的kernel部分。

https://developer.nvidia.com/embedded/dlc/l4t-jetson-driver-package-32-1-jetson-nano

下载并解压后,得到如下文件系统。

2. 准备kernel

Host: sudo su sudo apt install nfs-kernel-server sudo echo "/home/lofyer/Downloads *(rw,no_root_squash,no_subtree_check)" >> /etc/exports sudo exportfs -avf

Jetson Nano: sudo su apt instlal libncurses-dev mount [email protected]:/home/lofyer/Downloads /mnt cd /mnt/ cp /proc/config.gz . gunzip config.gz mv config .config make menuconfig # find and enable kvm, tegra hypervisor make -j4; make -j4 modules_install make -j4 Image cp arch/arm64/boot/Image /boot/Image-kvm

然后编辑启动项,默认从新kernel启动。

vi /boot/extlinux/extlinux.conf

TIMEOUT 10 DEFAULT secondary

MENU TITLE p3450-porg eMMC boot options

LABEL primary MENU LABEL primary kernel LINUX /boot/Image INITRD /boot/initrd APPEND ${cbootargs} rootfstype=ext4 root=/dev/mmcblk0p1 rw rootwait

LABEL secondary MENU LABEL kernel with kvm LINUX /boot/Image-kvm INITRD /boot/initrd APPEND ${cbootargs} rootfstype=ext4 root=/dev/mmcblk0p1 rw rootwait

3. 尝试qemu-kvm

自带的:

apt install qemu-kvm kvm --help

自己编的:

git clone https://github.com/qemu/qemu cd qemu ./configure --enable-kvm make -j4

只能使用machine类型为arm进行加速。

4. 看看FT

算了,现在不看了,等下半年。

title: "基于ARM(NVIDIA-JETSON-NANO)编译NetLogo" date: 2019-04-06 categories: - "abm" - "devices" -tags: - "NVIDIA" - "Jetson Nano" - "NetLogo"


本文主要目的为测试这块板子的性能,看看其是否有作为边缘节点的能力。

Env

Ubuntu 18.04(jetson-nano-sd-r32.1-2019-03-18)

Prepare

$ sudo set -i 's/ports.ubuntu.com/mirrors.ustc.edu.cn/g' /etc/apt/sources.list $ sudo apt install -y curl x11vnc openjdk openjfx libopenjfx-jni libopenjfx-java

Build

$ git clone https://github.com/NetLogo/NetLogo $ cd NetLogo $ git submodule update --init $ ./sbt netlogo/compile

Run and Package

$ ./sbt netlogo/run $ ./sbt dist/buildNetLogo

Addon: Add VNC server to your board

$ sudo apt install -y x11nvc $ x11vnc # to generate ~/.vnc files $ echo 'x11vnc --loop &' >> ~/.xsessionrc

Ref

https://github.com/NetLogo/NetLogo/wiki/Building

https://github.com/NetLogo/NetLogo/wiki/Releasing
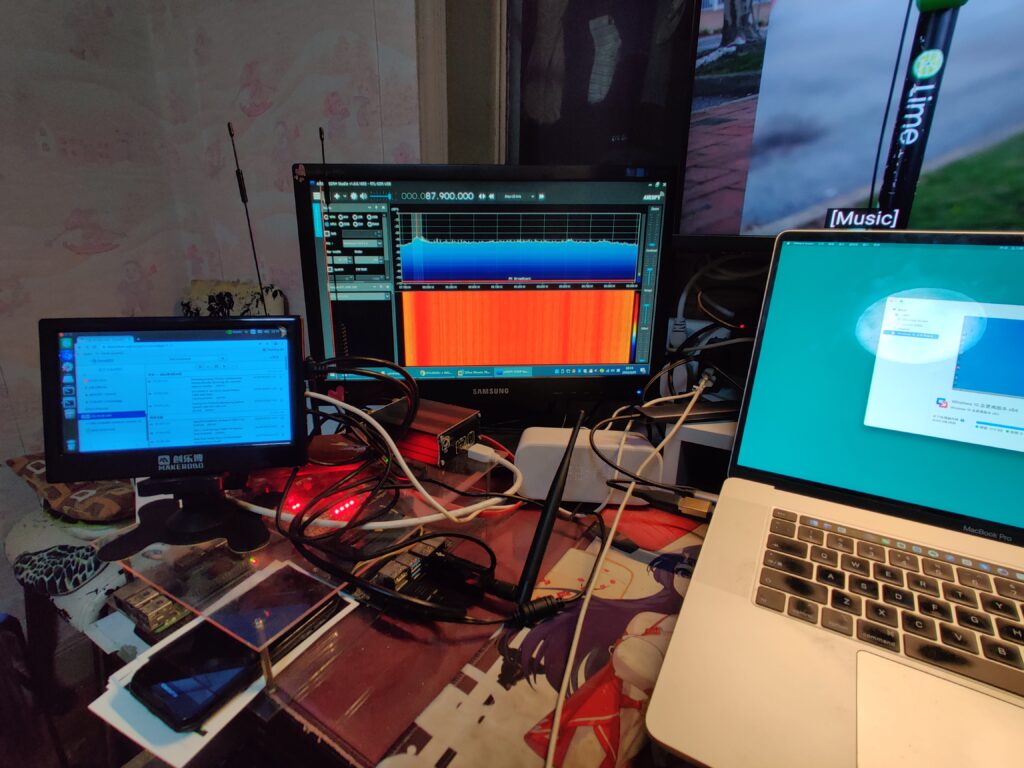
how to lock/unlock/root nexus 5

今日入手Nexus5美版(D820) blahblahblah... 好吧,开始unlock以及root

先下载这个包,里面包含CM的镜像,unlock/lock的apk http://cloud.lofyer.org/public.php?service=files&t=af14640b4f32d2e491d80a117db2bbe9

下载完成后,同时按住音量上下键再按开机,进入bootloader的前奏(相当于bios选项),此时电脑上应该会有所表示(比如windows的弹出要安装驱动啦,没驱动下个sdk搜索一下,比如linux的dmesg啦)

解压下载的文件,运行里面的root-$YOUROS(win、mac、linux)脚本,然后你看到请求unlock的选项,选择unlock并按电源键确认,此时pc上的脚本也会让你下一步; 下一步就是出现红色的机器人,说正在写脚本以及镜像,在写的时候pc上的脚本再下一步就可以自动让它退出了,然后稍等几分钟让它重启,重启的时候你会看到google标志下面的锁标志。

出于莫名其妙的安全感,在root以后可以安装压缩包里面的apk文件将bootloader再次锁上,这样,就这样。

title: "wrt54g v5添加usb" date: 2012-10-12 categories: - "devices"


1.dd-wrt.com下载固件包及源码包

2.编译添加或者配置usb存储支持

3.按接口图添加usb

http://www.home-wifi.com/forum.php?mod=viewthread&page=1&tid=3962

注意焊点位置,两个数据线左边D+,右边D-,下边的472是4.7k的下拉电阻,右边两个电阻是另一组USB口。所以直接引线就可以,但是我的优盘经常不能识别,就又在USB座上把两条数据线对地接了10k的下拉电阻,相当于和图上的472并起来,现在使用很正常。 bh

使用5V 3A电源给路由器供电,不用安装7805了,电源线直接接到电源插座

lbh

dd


title: "eZ430-Chronos入手" date: 2013-12-16 categories: - "devices"


IMG_20131216_160008

入手的是433Mhz,相当于国际版。 关于官方介绍可至eZ430-chronos查阅。 下载Control Center for Windows 下载Control Center for Linux

然后将toolkit的USBRF插入PC,选择控制台中的ACC标签并“start ap,腕表选择“#”号键至ACC,再按下键即可于控制台中显示加速度传感器数值。 同样PPT为按键映射,SYNC为时间设置,TFBSL尚未使用。

编程 TBD

LeapMotion相关

LeanMotion入手

卖家太给力了,昨天就顺丰发货,今天下午我冒着炎炎烈日去取货,激动。。

先来张盒子,看着就感觉那帮老外工业设计功底深厚。 DSC_0003

开箱:Leapmotion一台,数据线两根(一长一短),说明书一张 DSC_0006

看着感觉好爽的样子~ DSC_0008

我拍的一段简单使用视频。


LeapMotion记录(2017-07)

已经在官网注册并下载了sdk(windows、linux,我没Mac),设备不出意外下个月到。 等到了再更新文章,到时会更新sdk配置,与arduino交互的相关代码。 可控的目前想到了飞行器、机械手(夹持器 - -)。

title: "LeapMotion controlled X4" date: 2013-09-15 categories: - "devices" tags: - "LeapMotion"


两者都入手已经一个月了,可平时有些忙(惰者多忙),也就只零零散散准备了一些资料,还没开始整合。 整个流程大概是这个我用文字描述的粗略的样子:

空间建模:获取飞行器初始坐标,与leapmotion的可视区域进行map。 一级控制:leapmotion获得的手掌运动信息(可预处理)进入arduino通过nfr2401发送给X4,进行粗略运动指令传达。 二级控制:根据摄像头采集的飞行器位置数据与手掌位置信息对比,进行二阶指令传达。 回馈控制:在二级控制的基础上进行微调。 错误返回:如果超出leapmotion可视范围,则进行回馈控制将X4返回初始位置(0,0,0),超出摄像头范围,则需。。。人工重置。

title: "Leapmotion 相关" date: 2013-08-02 categories: - "devices" tags: - "LeapMotion"


在Windows中

夹持器与四轴飞行器都是Arduino-Based,通信就用串口。 代码放在git.lofyer.org 感觉VS好难。。试试在gentoo下驱动leapmotion

在Gentoo下使用,这个方式应该适用于所有非debian系

先下载sdk包,下载后解压。 看到里面有个deb的包,用alien转化为tar包

alien -t Leap-0.8.0-x64.deb tar xf leap-0.8.0.tgz cp -irf usr/* /usr/local/ cp -irf lib/udev/rules.d/25-com-leapmotion-leap.rules /etc/udev/rules.d

然后将普通用户加入plugdev组

sudo usermod -a -G plugdev $USER

刷新组关系,注销当前用户也可

exec su -l $USER

运行leapd与LeapControlPanel即可

在64位机器上缺少32位库文件 freetype.so.6, libasound.so.2

sudo emerge -avt app-emulation/emul-linux-x86-xlibs sudo emerge emul-linux-x86-soundlibs

实例:编译MotionVisualizer

Make -C Builds/Linux

Using Gpu in RaspberryPi

We had a wiki here. http://elinux.org/RPi_Xorg_rpi_Driver#Design

And vc sdk on github. It's also in /opt/vc. https://github.com/raspberrypi

X using gpu. https://github.com/simonjhall/fbdev_exa

Playback accelerating. http://wiki.matthiasbock.net/index.php/Hardware-accelerated_video_playback_on_the_Raspberry_Pi

Compile gstreamer{*} in Pi http://permalink.gmane.org/gmane.comp.video.gstreamer.devel/43011

Using wayland instead of X Here's the build instruction http://wayland.freedesktop.org/raspberrypi.html For recently PI_DEBIAN img, we should just

apt-get install weston weston-dev

Using xwayland to run X application in wayland..

Notes: 1. If you're going to compile cairo using egl, you shall meet a problem like undeclared 'None', just DEFINE one as 0L. 2. Using soft link rather than copying one when library is missing.

Waiting4Test Tuning Rasbian Speedup CPU: raspi-config arm_freq=900 I always use this hack and my rpi run without problem Change scheduler/elevator at boot time: we use more responsive/less disk io usage scheduler: modify the /boot/cmdline.txt

dwc_otg.lpm_enable=0 root=/dev/mmcblk0p2 rootfstype=ext4 rootflags=commit=120,data=writeback elevator=deadline rootwait quiet

Tuning sysctl.conf: as manual say, sysctl.conf is the “Configuration file for setting system variables”... well there are lot of variables you can put inside this file and for everyone we can write a book. Our goal is to gain more speed and tell our system to use less io/ram. Let’s put in the /etc/sysctl.conf:

vm.dirty_background_ratio = 20 vm.dirty_expire_centisecs = 0 vm.dirty_ratio = 80 vm.dirty_writeback_centisecs = 1200 vm.overcommit_ratio = 2 vm.laptop_mode = 5 vm.swappiness = 10

Tuning SDCard: Quite hard to understand, but changing the partition alignment of the SDCard can highly improve the write speed of our sdcard. Basically we have to align the first partition to the erase block size of our sdcard. I suggest to read an reread the reference link. To do that in our sdcard that contain our RaspberryPI Debian distro we have to: backup our filesystem from linux: cd /media/mymmcblk0p2/ (the partitition that’s contain debian fs) tar -cvpzf /home/gibbio/RPI-TC_fs.tgz --exclude=./proc --exclude=./lost+found --exclude=./sys --exclude=./mnt --exclude=./media --exclude=./dev ./ cd /media/mymmcblk0p1/ (the partitition that’s contain boot kernel etc) tar -cvpzf /home/gibbio/RPI-TC_boot.tgz ./ Now use printcsd.py to find the erase block size, most sd have 128K so we use 128K/Sector size = 256 sectors (mine have 64k so we have to use 64k/512b = 128 sector alignement)

sfdisk -f -H224 -S56 /dev/mmcblk0 Checking that no-one is using this disk right now ... OK Disk /dev/mmcblk0: 244448 cylinders, 224 heads, 56 sectors/track Old situation: Units = cylinders of 6422528 bytes, blocks of 1024 bytes, counting from 0 Device Boot Start End #cyls #blocks Id System /dev/mmcblk0p1 0 - 0 0 0 Empty /dev/mmcblk0p2 0 - 0 0 0 Empty /dev/mmcblk0p3 0 - 0 0 0 Empty /dev/mmcblk0p4 0 - 0 0 0 Empty Input in the following format; absent fields get a default value. Usually you only need to specify and (and perhaps ). /dev/mmcblk0p1 :,8,c /dev/mmcblk0p1 0+ 7 8- 50175+ c W95 FAT32 (LBA) (enter enter) /dev/mmcblk0p2 : /dev/mmcblk0p2 8 1246 1239 7771008 83 Linux /dev/mmcblk0p3 : /dev/mmcblk0p3 0 - 0 0 0 Empty /dev/mmcblk0p4 : /dev/mmcblk0p4 0 - 0 0 0 Empty New situation: Units = cylinders of 6422528 bytes, blocks of 1024 bytes, counting from 0 Device Boot Start End #cyls #blocks Id System /dev/mmcblk0p1 0+ 7 8- 50175+ c W95 FAT32 (LBA) /dev/mmcblk0p2 8 1246 1239 7771008 83 Linux /dev/mmcblk0p3 0 - 0 0 0 Empty /dev/mmcblk0p4 0 - 0 0 0 Empty Warning: no primary partition is marked bootable (active) This does not matter for LILO, but the DOS MBR will not boot this disk. Do you want to write this to disk? [ynq] y Successfully wrote the new partition table Re-reading the partition table ... If you created or changed a DOS partition, /dev/foo7, say, then use dd(1) to zero the first 512 bytes: dd if=/dev/zero of=/dev/foo7 bs=512 count=1 (See fdisk(8).)

gibbio # fdisk -l... Disk /dev/mmcblk0: 8010 MB, 8010072064 bytes 224 heads, 56 sectors/track, 1247 cylinders, total 15644672 sectors Units = sectors of 1 * 512 = 512 bytes Sector size (logical/physical): 512 bytes / 512 bytes I/O size (minimum/optimal): 512 bytes / 512 bytes Disk identifier: 0x000ee283 Device Boot Start End Blocks Id System /dev/mmcblk0p1 1 100351 50175+ c W95 FAT32 (LBA) /dev/mmcblk0p2 100352 15642367 7771008 83 Linux

now create ext4 FS: mke2fs -t ext4 -E stripe-width=32 -m 0 /dev/mmcblk0p2 make FAT32 partition via gparted gibbio # fdisk /dev/mmcblk0 Command (m for help): p Disk /dev/mmcblk0: 8010 MB, 8010072064 bytes 224 heads, 56 sectors/track, 1247 cylinders, total 15644672 sectors Units = sectors of 1 * 512 = 512 bytes Sector size (logical/physical): 512 bytes / 512 bytes I/O size (minimum/optimal): 512 bytes / 512 bytes Disk identifier: 0x000ee283 Device Boot Start End Blocks Id System /dev/mmcblk0p1 1 100351 50175+ c W95 FAT32 (LBA) /dev/mmcblk0p2 100352 15642367 7771008 83 Linux Command (m for help): x Expert command (m for help): p Disk /dev/mmcblk0: 224 heads, 56 sectors, 1247 cylinders Nr AF Hd Sec Cyl Hd Sec Cyl Start Size ID 1 00 0 2 0 223 56 7 1 100351 0c 2 00 0 1 8 223 56 1023 100352 15542016 83 3 00 0 0 0 0 0 0 0 0 00 4 00 0 0 0 0 0 0 0 0 00 Expert command (m for help): b Partition number (1-4): 1 New beginning of data (1-100351, default 1): 128 Expert command (m for help): w The partition table has been altered! Calling ioctl() to re-read partition table. Syncing disks. Now eject the sdcard, reinsert and make the restore from the tgz: cd /media/mymmcblk0p2/ tar -xvpzf RPI-TC_fs.tgz -C ./ mkdir proc mnt sys boot dev umount /media/mymmcblk0p2/ cd /media/mymmcblk0p1/ tar -xvpzf RPI-TC_boot.tgz -C ./ umount /media/mymmcblk0p1/ Eject the sdcard, plug into our Raspberry Pi and power on!

Arduino相关

目前最流行的是uno系列,而leonardo好象是在1.0.1后才加入的,其ide开发是在github上进行。 设计很清爽(因为没有UI设计师吧),希望别像keil一样越来越冗余。


Arduino IO生成波形的问题(2012)

1
2
3
4
DigitalWrite(pin,HIGH);
DELAY(10);
DigitalWrite(pin,LOW)
DELAY(10);

观察波形(上升沿触发)频率是51Hz,峰值为0.520V(使用外接电源的情况下,USB作电源为0.505V)。 除掉市电滤波的原因,应该是128本身Timer造成的问题,因DELAY使用的是Timer,选中的端口同样为Timer可用的端口,故在电平维持时可看到波形有毛刺(示波器太烂了吧)。


使用Arduino显示主机CPU

https://github.com/lofyer/arduino-hostcpuload-led

用libgtop2的库,已完成。 注意: 数据以ascii类型传输,调用led时转化为int cpu利用率算式:

1
(float)(100\*(cpu\_time2.(sys+user)-cpu\_time2.(sys+user))/(cpu\_time2.total-cpu\_time1.total))