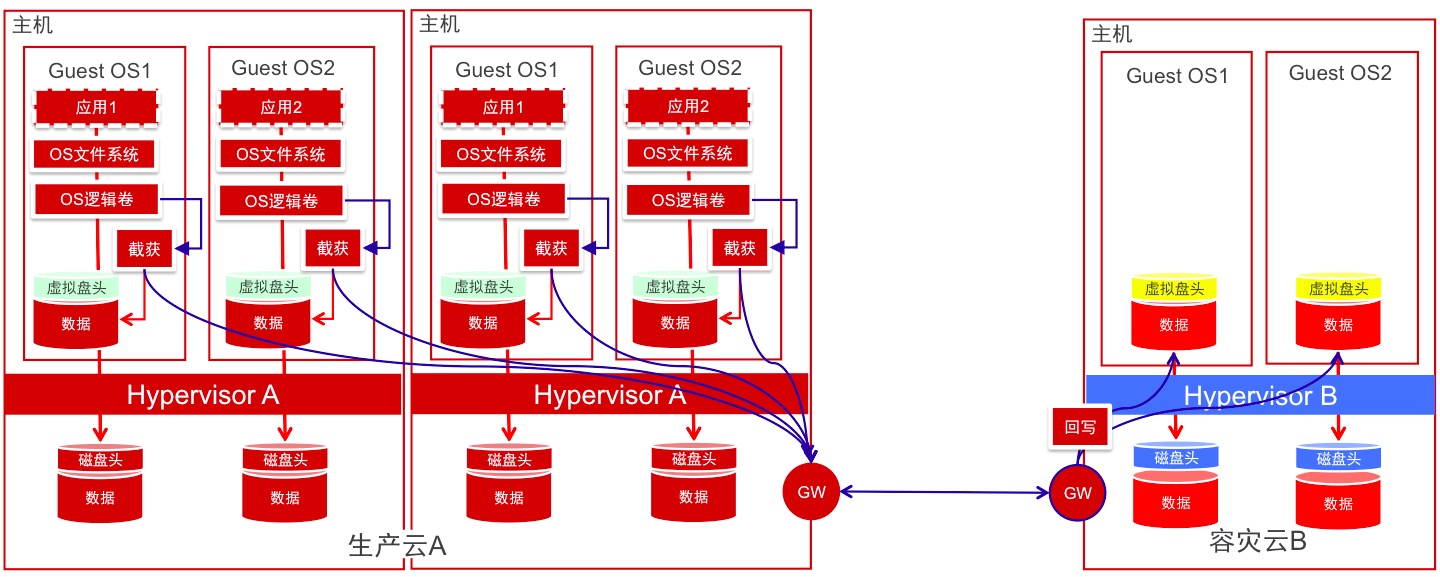
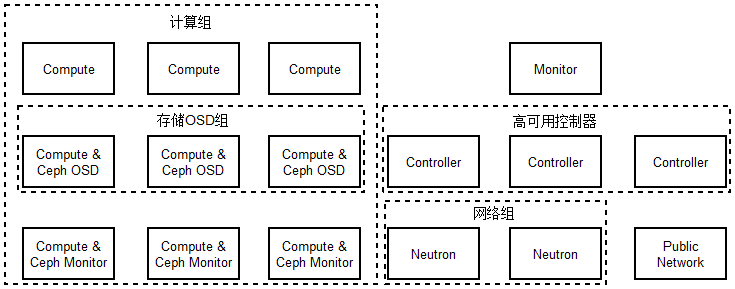
本文将讲述如何在OpenStack中使用SDN交换机,同时将OpenDayLight作为控制器,测试网络类型为vxlan。
本文适用目标为OpenStack Neutron组件,但理论上说包括任何可使用Neutron组件服务的云管理平台,比如oVirt。
在搭建Neutron时,笔者使用了现成的OpenStack单节点平台(可以参考https://github.com/lofyer/openstack-pxe-deployment,为防止出现3.1节末的错误,请使用Newton之前版本,我手贱部署了最新的),但为了减少搭建部署的麻烦,我会在后期尝试直接使用Neutron VM Appliance,方便集成(暂不确定是否影响性能)。
update 2017-05-27: 当前版本zstack的云路由功能vyos所实现的nfv软路由,笔者会考虑将Neutron移植到ZStack中,如此以来SDN即可将注意力主要放在Neutron。
update 2017-06-01: 加入盛科交换机,4.10内核的vtep可直接内核实现,参考Linux doc 。
update 2017-06-07: OpenStack版本从Ocata切换为Newton,实验3.3重新做了。
update 2017-06-12: 使用 Neutron appliance,并添加hooks,构建ZStack SDN解决方案,来源可自行搜索oVirt的相关资料
Pica8 P-5101 48+4*8 10Gb SDN交换机2台(吵地脑袋疼),OpenStack Ocata,OpenDayLight Lastest,管理机器。
mininet虚拟机地址:192.168.0.68
操作机地址:192.168.0.55
拓扑使用miniedit制作,同时首选项中打开“Start CLI”,操作机“ssh -Y mininet@MININET_IP”后,运行“sudo ~/mininet/examples/mininet.py”以开启。
文字描述可参考http://blog.scottlowe.org/2012/11/27/connecting-ovs-bridges-with-patch-ports/以及其中链接。
miniedit拓扑:
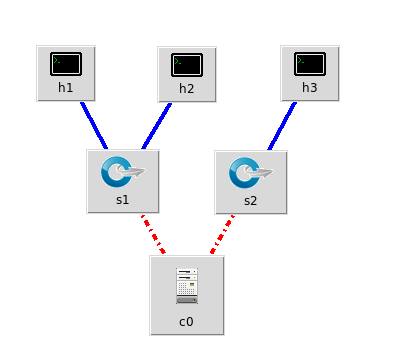
目的:连接两个交换机,使得h1与h3互通。
方法:将两个交换机上的一个端口组组成patch。
ovs-vsctl -- add-port s1 patch1 -- set interface patch1 type=patch options:peer=patch2 -- add-port s2 patch2 -- set interface patch2 type=patch options:peer=patch1
结果:
root@mininet-vm:/home/mininet# ovs-vsctl show 918037ec-b307-45d7-a75a-f1ac4337d135 Bridge "s1" Controller "tcp:127.0.0.1:6633" is_connected: true fail_mode: secure Port "s1" Interface "s1" type: internal Port "s1-eth2" Interface "s1-eth2" Port "s1-eth1" Interface "s1-eth1" Port "patch1" Interface "patch1" type: patch options: {peer="patch2"} Bridge "s2" Controller "tcp:127.0.0.1:6633" is_connected: true fail_mode: secure Port "s2-eth1" Interface "s2-eth1" Port "s2" Interface "s2" type: internal Port "patch2" Interface "patch2" type: patch options: {peer="patch1"} ovs_version: "2.0.2"
miniedit拓扑:同上。
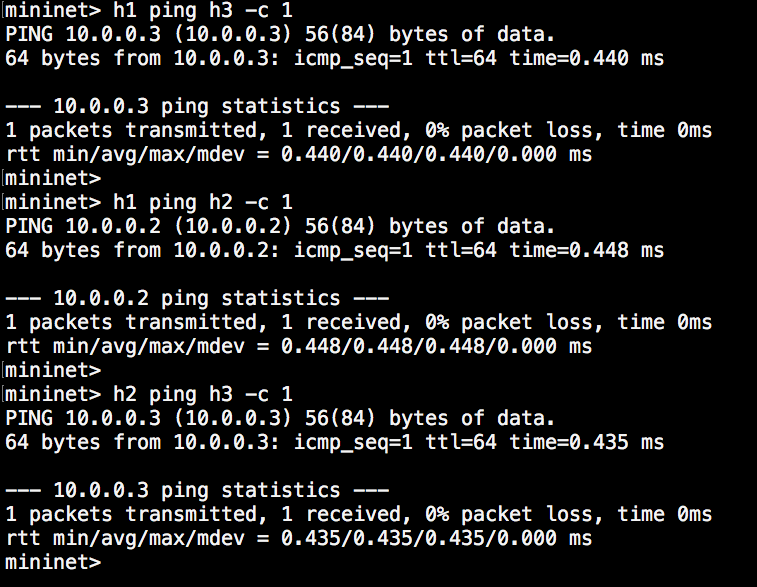
目的:阻断h1与h2、h2与h3,使得h1与h3互通。
方法:下发如下流表。
阻断h2与h1/h3的协议封包: ovs-ofctl add-flow s1 in_port=2,arp,ip,nw_dst=10.0.0.1,actions=drop ovs-ofctl add-flow s1 in_port=2,arp,ip,nw_dst=10.0.0.3,actions=drop
结果
mininet> h1 ping h2 -c 2 PING 10.0.0.2 (10.0.0.2) 56(84) bytes of data. ^C --- 10.0.0.2 ping statistics --- 2 packets transmitted, 0 received, 100% packet loss, time 1006ms
mininet> h2 ping h1 -c 2 PING 10.0.0.1 (10.0.0.1) 56(84) bytes of data. ^C --- 10.0.0.1 ping statistics --- 2 packets transmitted, 0 received, 100% packet loss, time 1000ms
mininet> h3 ping h2 -c 2 PING 10.0.0.2 (10.0.0.2) 56(84) bytes of data. ^C --- 10.0.0.2 ping statistics --- 2 packets transmitted, 0 received, 100% packet loss, time 999ms
mininet> h2 ping h3 -c 2 PING 10.0.0.3 (10.0.0.3) 56(84) bytes of data. ^C --- 10.0.0.3 ping statistics --- 2 packets transmitted, 0 received, 100% packet loss, time 1006ms
mininet> h1 ping h3 -c 2 PING 10.0.0.3 (10.0.0.3) 56(84) bytes of data. 64 bytes from 10.0.0.3: icmp_seq=1 ttl=64 time=2.37 ms 64 bytes from 10.0.0.3: icmp_seq=2 ttl=64 time=0.561 ms
--- 10.0.0.3 ping statistics --- 2 packets transmitted, 2 received, 0% packet loss, time 1001ms rtt min/avg/max/mdev = 0.561/1.466/2.372/0.906 ms mininet> h3 ping h1 -c 2 PING 10.0.0.1 (10.0.0.1) 56(84) bytes of data. 64 bytes from 10.0.0.1: icmp_seq=1 ttl=64 time=2.49 ms 64 bytes from 10.0.0.1: icmp_seq=2 ttl=64 time=0.548 ms
--- 10.0.0.1 ping statistics --- 2 packets transmitted, 2 received, 0% packet loss, time 1001ms rtt min/avg/max/mdev = 0.548/1.521/2.494/0.973 ms mininet>
root@mininet-vm:~# ovs-ofctl dump-flows s1 NXST_FLOW reply (xid=0x4): cookie=0x0, duration=485.308s, table=0, n_packets=0, n_bytes=0, idle_age=485, ip,in_port=2,nw_dst=10.0.0.1 actions=drop cookie=0x0, duration=483.569s, table=0, n_packets=3, n_bytes=294, idle_age=183, ip,in_port=2,nw_dst=10.0.0.3 actions=drop cookie=0x0, duration=1715.894s, table=0, n_packets=93, n_bytes=3906, idle_age=202, arp,in_port=1,arp_tpa=10.0.0.2 actions=drop cookie=0x0, duration=715.43s, table=0, n_packets=4, n_bytes=392, idle_age=400, ip,in_port=1,nw_dst=10.0.0.2 actions=drop
首先来看一下实验拓扑:
图。。。。。。
SDN交换机 管理地址:192.168.0.250/24,
OpenStack Controller/Neutron IP: 192.168.0.80
OpenDayLight IP: 192.168.0.90 Web: http://192.168.0.90:8181/index.html
在主机192.168.0.90上下载启动Boron版本OpenDayLight(其他版本未测试),然后解压运行(需要Java环境):
unzip distribution-karaf-0.5.3-Boron-SR3.zip cd distribution-karaf-0.5.3-Boron-SR3
./bin/start
yum localinstall -y https://repos.fedorapeople.org/repos/openstack/openstack-ocata/rdo-release-ocata-3.noarch.rpm systemctl enable openvswitch systemctl start openvswitch ovs-vsctl set-manager tcp:192.168.0.90:6640
./bin/client
opendaylight-user@root> feature:install odl-netvirt-openstack odl-dlux-all odl-dlux-yangman odl-mdsal-apidocs odl-netvirt-ui
然后访问http://192.168.0.90:8181/index.html,用户密码为admin/admin,可以看到我们刚刚添加的本地OVS。
首先要清除原有的实例和neutron网络。
openstack server list +--------------------------------------+-----------+---------+------------+-------------+------------------------------------------------------+ | ID | Name | Status | Task State | Power State | Networks | +--------------------------------------+-----------+---------+------------+-------------+------------------------------------------------------+ | d45b1646-b559-4d6d-963c-af3da205aa36 | instance3 | SHUTOFF | - | Shutdown | flat-ens39=192.168.0.108; sharednet1=192.168.118.203 | +--------------------------------------+-----------+---------+------------+-------------+------------------------------------------------------+
openstack server delete instance3
openstack subnet list +--------------------------------------+-------------+--------------------------------------+------------------+ | ID | Name | Network | Subnet | +--------------------------------------+-------------+--------------------------------------+------------------+ | b0acb3ad-22d4-491c-94e7-488aca906398 | flat-subnet | b8f95552-9a45-49ae-b080-2e0041d4b2a0 | 192.168.0.0/24 | | c066992d-294d-4cd6-a3fb-0386619922c7 | subnet1 | 5ac25e6f-bf49-4217-abbc-11bf171c0a3e | 192.168.118.0/24 | +--------------------------------------+-------------+--------------------------------------+------------------+
openstack router list +------------------------------+-------------------+--------+-------+-------------+-------+------------------------------+ | ID | Name | Status | State | Distributed | HA | Project | +------------------------------+-------------------+--------+-------+-------------+-------+------------------------------+ | 78507b26-38f0-4b4a- | router-flat-ens39 | ACTIVE | UP | False | False | de2aea51161642759a687b5768b2 | | a3c6-13d15c4f9665 | | | | | | 3b7e | +------------------------------+-------------------+--------+-------+-------------+-------+------------------------------+ ........
openstack port list
接下来,我们将控制节点(neutron管理节点)与计算节点的OVS交于ODL管理。 首先停止相应服务。
systemctl stop neutron-openvswitch-agent systemctl disable neutron-openvswitch-agent systemctl stop neutron-l3-agent systemctl disable neutron-l3-agent
systemctl stop neutron-server systemctl stop neutron-l3-agent
然后清空OVS数据库。
systemctl stop openvswitch rm -rf /var/log/openvswitch/* rm -rf /etc/openvswitch/conf.db systemctl start openvswitch
ovs-vsctl show bdf45776-c7c2-4df4-9911-007e89b67bbe ovs_version: "2.6.1"
将其交予ODL管理。
ovs-vsctl set-manager tcp:192.168.0.90:6640
然后在控制节点与计算节点设置用来vxlan通信的本地端,这里只有一个节点192.168.0.80。
ovs-vsctl set Open_vSwitch . other_config:local_ip=192.168.0.80
设置好以后可以在节点上看到ODL自动创建了一个连接到ODL控制器的br-int。
ovs-vsctl show bdf45776-c7c2-4df4-9911-007e89b67bbe Manager "tcp:192.168.0.90:6640" is_connected: true Bridge br-int Controller "tcp:192.168.0.90:6653" is_connected: true fail_mode: secure Port br-int Interface br-int type: internal ovs_version: "2.6.1"
ovs-vsctl get Open_vSwitch . other_config
此时reloadODL界面,可以看到多了个OVS。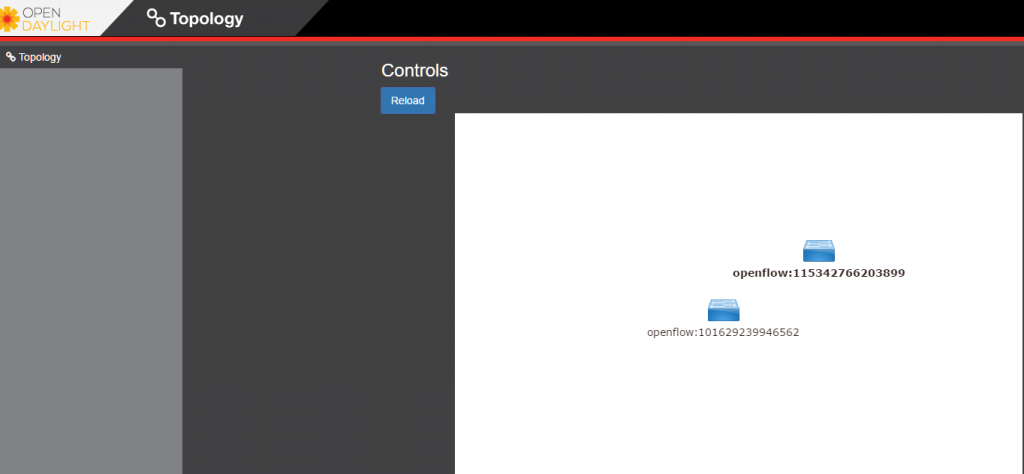
接下来让neutron使用ODL,我们首先需要在neutron控制节点上安装一个对应包。
对于将ODL放置于OS控制节点的同学可以参考如下内容以修改swift端口:
First, ensure that port 8080 (which will be used by OpenDaylight to listen for REST calls) is available. By default, swift-proxy-service listens on the same port, and you may need to move it (to another port or another host), or disable that service. It can be moved to a different port (e.g. 8081) by editing /etc/swift/proxy-server.conf and /etc/cinder/cinder.conf, modifying iptables appropriately, and restarting swift-proxy-service. Alternatively, OpenDaylight can be configured to listen on a different port, by modifying the jetty.port property value in etc/jetty.conf.
yum install -y python-networking-odl
修改/etc/neutron/plugins/ml2/ml2_conf.ini并添加内容。
crudini --set /etc/neutron/plugins/ml2/ml2_conf.ini ml2 mechanism_drivers opendaylight crudini --set /etc/neutron/plugins/ml2/ml2_conf.ini ml2 tenant_network_types vxlan
cat <> /etc/neutron/plugins/ml2/ml2_conf.ini [ml2_odl] url = http://192.168.0.90:8080/controller/nb/v2/neutron password = admin username = admin EOF
然后修改服务后端为ODL。
crudini --set /etc/neutron/neutron.conf DEFAULT service_plugins odl-router crudini --set /etc/neutron/dhcp_agent.ini DEFAULT force_metadata True crudini --set /etc/neutron/dhcp_agent.ini ovs ovsdb_interface vsctl
重置neutron数据库并重启服务。
mysql -e "DROP DATABASE IF EXISTS neutron_ml2;" -uroot -p mysql -e "CREATE DATABASE neutron_ml2 CHARACTER SET utf8;" -uroot -p neutron-db-manage --config-file /etc/neutron/neutron.conf --config-file /etc/neutron/plugins/ml2/ml2_conf.ini upgrade head systemctl start neutron-server
验证是否成功。
curl -u admin:admin http://192.168.0.90:8080/controller/nb/v2/neutron/networks { "networks" : [ ] }
最后在openstack中创建网络与实例。
neutron router-create router1 neutron net-create private neutron subnet-create private --name=private_subnet 10.10.5.0/24 neutron router-interface-add router1 private_subnet nova boot --flavor --image --nic net-id= test1 nova boot --flavor --image --nic net-id= test2
添加浮动IP。
ovs-vsctl set Open_vSwitch . other_config:provider_mappings=physnet1:eth1 neutron net-create public-net -- --router:external --is-default --provider:network_type=flat --provider:physical_network=physnet1 neutron subnet-create --allocation-pool start=10.10.10.2,end=10.10.10.254 --gateway 10.10.10.1 --name public-subnet public-net 10.10.0.0/16 -- --enable_dhcp=False neutron router-gateway-set router1 public-net
neutron floatingip-create public-net nova floating-ip-associate test1
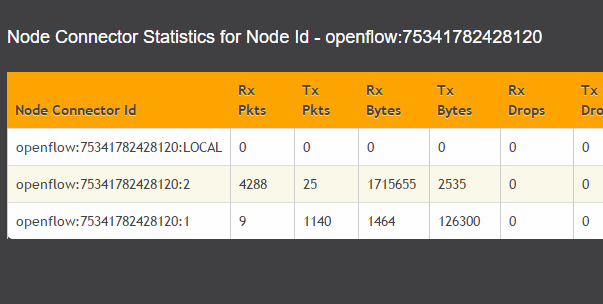
在OpenStack O版中创建网络时ODL与OS分别出现如下错误。
ODL: 2017-06-03 11:27:10,768 | ERROR | pool-46-thread-1 | QosInterfaceStateChangeListener | 350 - org.opendaylight.netvirt.neutronvpn-impl - 0.3.3.Boron-SR3 | Qos:Exception caught in Interface Operational State Up event java.lang.IllegalArgumentException: Supplied value "tapd5e5b153-39" does not match required pattern "^[0-9a-fA-F]{8}-[0-9a-fA-F]{4}-[0-9a-fA-F]{4}-[0-9a-fA-F]{4}-[0-9a-fA-F]{12}\(" at com.google.common.base.Preconditions.checkArgument(Preconditions.java:145)[65:com.google.guava:18.0.0] at org.opendaylight.yang.gen.v1.urn.ietf.params.xml.ns.yang.ietf.yang.types.rev130715.Uuid.<init>(Uuid.java:55)[80:org.opendaylight.mdsal.model.ietf-yang-types-20130715:2013.7.15.9_3-Boron-SR3] at org.opendaylight.netvirt.neutronvpn.QosInterfaceStateChangeListener.add(QosInterfaceStateChangeListener.java:61)[350:org.opendaylight.netvirt.neutronvpn-impl:0.3.3.Boron-SR3] at org.opendaylight.netvirt.neutronvpn.QosInterfaceStateChangeListener.add(QosInterfaceStateChangeListener.java:27)[350:org.opendaylight.netvirt.neutronvpn-impl:0.3.3.Boron-SR3] at org.opendaylight.genius.datastoreutils.AsyncDataTreeChangeListenerBase\)DataTreeChangeHandler.run(AsyncDataTreeChangeListenerBase.java:136)[310:org.opendaylight.genius.mdsalutil-api:0.1.3.Boron-SR3] at java.util.concurrent.ThreadPoolExecutor.runWorker(ThreadPoolExecutor.java:1142)[:1.8.0_131] at java.util.concurrent.ThreadPoolExecutor$Worker.run(ThreadPoolExecutor.java:617)[:1.8.0_131] at java.lang.Thread.run(Thread.java:748)[:1.8.0_131]
OS: ERROR neutron.plugins.ml2.managers [req-8174eb6e-6a01-428e-9c3d-d9f115dfa36b - - - - -] Failed to bind port d5e5b153-390a-4129-babd-7work': None, 'id': u'f01e69c5-096e-4d01-a239-5dbe37005e9b', 'network_type': u'vxlan'}]
原因可能是版本传参变了,ODL没及时更新,但我不会Java,会也不想去改ODL,所以我推荐读者用个老版本的Neutron,比如M版、N版啥的。
IP: 192.168.0.101
在ODL结束以后,我们再来试一下OpenStack与SDN交换机的集成,与上一节相互独立,即一个全新的OpenStack Newton环境。
由于商业法务问题,我不会将Pica8的OpenStack插件源码全部放出来,另外放出来意义也不大,现有SDN交换机的同学可以直接向厂商索要。
/usr/lib/python2.7/site-packages/neutron/plugins/ml2/drivers/
Pica8交换机工作在OVS模式下,需要将neutron server与OVS Manager相连(管理网口),或许有其他方法。
首先将插件文件拷贝至/usr/lib/python2.7/site-packages/neutron/plugins/ml2/drivers/,目录结构如下。
/usr/lib/python2.7/site-packages/neutron/plugins/ml2/drivers/pica8/ ├── config.pyc ├── db.pyc ├── exceptions.pyc ├── init.pyc ├── mechanism_pica8.pyc ├── ml2_conf_pica8.ini ├── rpc.pyc └── vtep.ovsschema
修改/usr/lib/python2.7/site-packages/neutron-9.3.1-py2.7.egg-info/entry_points.txt添加neutron驱动。
... [neutron.ml2.mechanism_drivers] ... pica8 = neutron.plugins.ml2.drivers.pica8.mechanism_pica8:Pica8Driver ...
创建/etc/neutron/plugins/ml2/ml2_conf_pica8.ini,并添加如下内容。
[ml2_pica8]
vtep_list=192.168.0.101
sync_interval = 60
openstack_version = newton
[ml2_mech_pica_switch:192.168.0.250] =:,,... =: # =:project_name,,vni, # ...
修改/usr/lib/systemd/system/neutron-server.service文件,在${DAEMON_ARGS}字段添加pica8的引导配置,需要停止neutron-server服务并systemctl daemon-reload。
--config-file=/etc/neutron/plugins/ml2/ml2_conf_pica8.ini
修改/etc/neutron/plugins/ml2/ml2_conf.ini,如下。
type_drivers = vlan,vxlan project_network_types = vxlan mechanism_drivers = pica8,openvswitch
bridge_mappings=:br-ex network_vlan_ranges = :1:4094
安装python-ovs库。
yum install -y python-pip pip install ovs
运行如下命令创建pica8插件数据库动作。
neutron-db-manage --config-file /etc/neutron/neutron.conf --config-file /etc/neutron/plugins/ml2/ml2_conf.ini revision -m "add pica8 mechanism driver" --expand
在生成的/usr/lib/python2.7/site-packages/neutron/db/migration/alembic_migrations/versions/newton/expand/94ca4fc9191b_add_pica8_mechanism_driver.py文件中添加如下内容。
def upgrade(): op.create_table( 'pica8_interfaces_v2', sa.Column('id', sa.String(length=36), nullable=False, primary_key=True), sa.Column('switch', sa.String(length=36), nullable=False), sa.Column('interface', sa.String(10), nullable=False) ) op.create_table( 'pica8_vlan_allocations_v2', sa.Column('id', sa.String(length=36), nullable=False, primary_key=True), sa.Column('project_id', sa.String(length=255), nullable=False), sa.Column('network_id', sa.String(length=36), nullable=False), sa.Column('segmentation_id', sa.Integer, nullable=False), sa.Column('vlan_id', sa.Integer, nullable=False), sa.Column('vm_reference', sa.Integer, nullable=False, default=0), sa.Column('interface_id', sa.String(length=36), nullable=True), sa.ForeignKeyConstraint(['interface_id'], ['pica8_interfaces_v2.id'], ondelete='CASCADE') ) def downgrade(): op.drop_table('pica8_interfaces') op.drop_table('pica8_vlan_allocations_v2')
执行如下命令升级数据库(如果失败请将最后参数替换为head)。
neutron-db-manage --config-file /etc/neutron/neutron.conf --config-file /etc/neutron/plugins/ml2/ml2_conf.ini upgrade 94ca4fc9191b
重启服务。
systemctl restart openstack-nova-api systemctl restart neutron-server
物理主机接入配置。
Edit the file /etc/neutron/plugins/ml2/ml2_conf_pica8.ini to contain the following content: =:project_name,,vni, is the interface of Pica8 switch connected to the physical host < project_name > is the name of the project owning the physical host is the vxlan id of the project network the physical host connects to
miniedit使用 Pica8手册 ODL手册 OpenDaylight with Openstack Guide OpenStack with NetVirt Installing OpenStack and OpenDaylight using DevStack https://wiki.opendaylight.org//blog/images/5/59/CloudIntegrationwithOpenStackOVSDBNetVirt.pdf

